
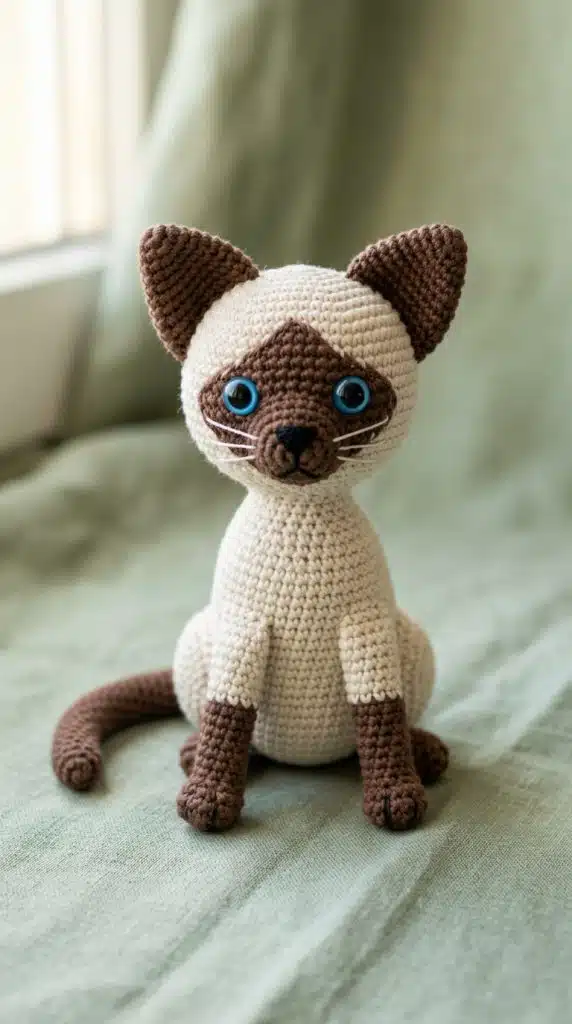
The Siamese is instantly recognizable by its dramatic color-point markings and strikingly large triangular ears.
Those vivid blue eyes and dark seal face mask make this breed one of the most rewarding amigurumi cats to crochet. Siamese cats are adored for their vocal, loyal personalities and are one of the most recognized breeds worldwide.
A handmade Siamese plush makes a deeply personal gift for any cat lover or grieving pet owner.
This pattern is completely free with no sign-up required, and includes full written instructions, materials, assembly steps, and color-point marking guidance. Let’s get started.
Pattern at a Glance
| Detail | Info |
|---|---|
| Skill Level | Beginner–Intermediate |
| Finished Size | Approx. 6 inches tall |
| Yarn Weight | Worsted Weight (4) |
| Hook Size | US G/6 (4.0mm) |
| Stitch(es) Used | Single crochet (sc) |
| Techniques Used | Magic ring, increase, invisible decrease, continuous rounds |
| Time to Complete | 4–8 hours |
| Stuffing Needed | Polyfill fiberfill |
| Safety Eyes | 9mm black safety eyes |
| Number of Pieces | 9 (Head, Body, 2 Ears, 2 Front Legs, 2 Back Legs, Tail) |
| Yarn Colors Needed | Cream/ivory, seal brown |
| Best Occasion / Use | Cat lover gift, pet memorial, nursery decor |
Materials You Will Need
Here is everything you need to crochet your Siamese cat amigurumi.
Yarn
- Cream/Ivory (body color): Approx. 80 yards — Lion Brand Vanna’s Choice “Linen” — use this for the head, body, and upper limbs to match the pale cool-toned coat of a seal point Siamese.
- Seal Brown (color points): Approx. 40 yards — Red Heart Super Saver “Coffee” — use this for the ear lining, facial mask, lower legs, paw tips, and tail end to replicate authentic Siamese point markings.
- Optional Blush/Shading (inner ear): Approx. 5 yards — Caron Simply Soft “Soft Pink” — use only for the inner ear surface to add a warm, realistic depth to the large Siamese ear.
Tools & Notions
- US G/6 (4.0mm) crochet hook
- Polyfill fiberfill stuffing
- Two 9mm black safety eyes
- Tapestry needle
- Stitch marker
- Scissors
- Straight pins
- Black embroidery floss (for nose and whisker dots)
🛒 Yarn Tip: The single most important yarn decision is choosing a true cool ivory for the body — avoid warm off-white or cream-yellow tones, as the Siamese coat reads as pale and icy against the dark points.
Abbreviations & Stitch Guide
All abbreviations below follow standard US crochet terminology.
BEFORE YOU SCROLL PAST
Most Popular This Week: 👇
👉 Free Cocker Spaniel Crochet Pattern Beginner Friendly
👉 Border Collie Crochet Pattern Ideas
| Abbreviation | Meaning |
|---|---|
| MR | Magic ring |
| ch | Chain |
| sl st | Slip stitch |
| sc | Single crochet |
| inc | Increase (2 sc in same stitch) |
| dec | Invisible decrease |
| BLO | Back loop only |
| st(s) | Stitch(es) |
| rnd | Round |
| rep | Repeat |
| () x# | Work stitches in parentheses the stated number of times |
| [ ] | Stitch count at end of round |
| FO | Fasten off |
| PM | Place marker |
💡 Invisible Decrease Tip: To work an invisible decrease, insert your hook through the front loops only of the next two stitches, then pull through and complete as a single crochet. This technique keeps edges smooth and is especially important for the Siamese’s tapered muzzle area and slim limb shaping.
Gauge
Gauge: 4 stitches x 4 rows = 1 inch in single crochet using US G/6 (4.0mm) and worsted weight yarn. For amigurumi, working at a tighter tension than your gauge swatch is more important than matching exact measurements, since tight stitches prevent the stuffing from showing through the pale ivory yarn.
Siamese Cat Crochet Pattern — Complete Instructions Step by Step
All pieces are made separately and assembled at the end; most parts are worked in continuous rounds with no slip stitch joins, so place a stitch marker at the start of each round and count stitches every single round without exception.
Get Free Patterns Every Week!
Get new patterns, videos & tutorials free in your inbox
🔒 No spam. Unsubscribe anytime.
Head
The Siamese has a distinctive wedge-shaped head with a broad, flat forehead and high cheekbones — these proportions are captured through a controlled increase-and-decrease sequence worked entirely in cream yarn.
Rnd 1: MR, 6 sc into ring. [6] Rnd 2: Inc in each st around. [12] Rnd 3: (Sc 1, inc) x 6. [18] Rnd 4: (Sc 2, inc) x 6. [24] Rnd 5: (Sc 3, inc) x 6. [30] Rnd 6: (Sc 4, inc) x 6. [36] Rnd 7: (Sc 5, inc) x 6. [42] Rnd 8: Sc around. [42] Rnd 9: Sc around. [42] Rnd 10: Sc around. [42] Rnd 11: Sc around. [42] Rnd 12: Sc around. [42]
Place 9mm safety eyes between Rnds 10 and 11, approximately 8 stitches apart, before continuing.
Rnd 13: (Sc 5, dec) x 6. [36] Rnd 14: (Sc 4, dec) x 6. [30] Rnd 15: (Sc 3, dec) x 6. [24]
Stuff the head firmly now before the opening becomes too small.
Rnd 16: (Sc 2, dec) x 6. [18] Rnd 17: (Sc 1, dec) x 6. [12] Rnd 18: Dec x 6. [6]
FO, leaving a 12-inch tail for sewing to body. Thread tail through remaining stitches to close.
💡 Head Tip: For the Siamese’s sleek wedge profile, stuff the head firmly but avoid over-rounding — a slightly less-spherical top gives a far more breed-accurate silhouette than a perfectly round ball.
Facial Mask
The Siamese facial mask is the single most defining breed feature — a rich seal-brown coloring covering the eye area, forehead bridge, and muzzle that is applied as surface embroidery after the head is fully assembled.
This piece is an embroidery detail applied to the finished head, not a separately crocheted piece. Using seal brown yarn on a tapestry needle, stitch a downward “V” shape starting from between the ears down to the stitch row just below the eyes. Fill in the V shape using dense satin stitches to create the characteristic dark mask of a seal point Siamese. Apply the facial mask before attaching the head to the body for easiest needle access.
Ears (Make 2)
The Siamese has exceptionally large, wide-based triangular ears set at the outer edges of the wedge head — each ear is crocheted in two layers, a cream outer and a seal-brown inner, then sewn together before attachment.
Outer Ear — Cream (make 2): Rnd 1: MR, 4 sc into ring. [4] Rnd 2: Inc in each st around. [8] Rnd 3: (Sc 1, inc) x 4. [12] Rnd 4: Sc around. [12] Rnd 5: (Sc 2, inc) x 4. [16] Rnd 6: Sc around. [16]
FO, leaving a 12-inch tail. Do not stuff. Flatten into a triangular shape.
Inner Ear — Seal Brown (make 2): Rnd 1: MR, 4 sc into ring. [4] Rnd 2: Inc in each st around. [8] Rnd 3: (Sc 1, inc) x 4. [12]
FO, leaving an 8-inch tail. Sew the flat inner ear to the front face of the outer ear using whip stitch, then pinch and fold the base slightly before attaching to the head.
💡 Ear Tip: Make the ears slightly larger than feels proportional during construction — Siamese ears are dramatically big, and undersized ears are the most common reason a finished piece does not read as a Siamese.
Body
The Siamese has a slender, elegant tubular body with a naturally narrower waist than most cat breeds — work this piece entirely in cream yarn to achieve the clean pale coat that contrasts with the color points.
Rnd 1: MR, 6 sc into ring. [6] Rnd 2: Inc in each st around. [12] Rnd 3: (Sc 1, inc) x 6. [18] Rnd 4: (Sc 2, inc) x 6. [24] Rnd 5: (Sc 3, inc) x 6. [30] Rnd 6: Sc around. [30] Rnd 7: Sc around. [30] Rnd 8: Sc around. [30] Rnd 9: Sc around. [30] Rnd 10: Sc around. [30] Rnd 11: (Sc 3, dec) x 6. [24] Rnd 12: Sc around. [24] Rnd 13: Sc around. [24] Rnd 14: Sc around. [24] Rnd 15: (Sc 2, dec) x 6. [18] Rnd 16: Sc around. [18]
Stuff the body firmly before continuing.
Rnd 17: (Sc 1, dec) x 6. [12] Rnd 18: Dec x 6. [6]
FO, leaving a 12-inch tail. Thread through remaining stitches to close.
💡 Body Tip: Keep the body noticeably slimmer than the head — a Siamese body is lean and elegant, not round like a Persian, so resist the urge to over-stuff this piece.
Front Legs (Make 2)
Siamese cats have long, slender front legs with small, neat oval paws — the lower section is worked in seal brown to create the breed-accurate color-point paw effect before switching to cream for the upper leg.
Begin with Seal Brown yarn: Rnd 1: MR, 6 sc into ring. [6] Rnd 2: Inc in each st around. [12] Rnd 3: Sc around. [12] Rnd 4: Sc around. [12] Rnd 5: (Sc 2, dec) x 3. [9]
Switch to Cream yarn: Rnd 6: Sc around. [9] Rnd 7: Sc around. [9] Rnd 8: Sc around. [9] Rnd 9: Sc around. [9] Rnd 10: Sc around. [9] Rnd 11: Sc around. [9] Rnd 12: Sc around. [9]
Stuff lightly — front legs should feel firm but not stiff.
FO, leaving a 10-inch tail for sewing. Flatten the top opening for attachment.
Back Legs (Make 2)
The Siamese back legs are slightly longer and more angular than the front legs, reflecting the breed’s naturally higher hindquarters — work these using the same two-color point method as the front legs.
Begin with Seal Brown yarn: Rnd 1: MR, 6 sc into ring. [6] Rnd 2: Inc in each st around. [12] Rnd 3: Sc around. [12] Rnd 4: Sc around. [12] Rnd 5: Sc around. [12] Rnd 6: (Sc 2, dec) x 3. [9]
Switch to Cream yarn: Rnd 7: Sc around. [9] Rnd 8: Sc around. [9] Rnd 9: Sc around. [9] Rnd 10: Sc around. [9] Rnd 11: Sc around. [9] Rnd 12: Sc around. [9] Rnd 13: Sc around. [9] Rnd 14: Sc around. [9]
Stuff lightly.
FO, leaving a 10-inch tail for sewing. Flatten the top opening for attachment.
Tail
The Siamese tail is long, slender, and tapers elegantly to a fine tip — the base begins in cream and transitions into seal brown at the tip end to replicate the breed’s distinctive tail-point coloring.
Begin with Cream yarn: Rnd 1: MR, 4 sc into ring. [4] Rnd 2: Sc around. [4] Rnd 3: Sc around. [4] Rnd 4: Sc around. [4] Rnd 5: Sc around. [4] Rnd 6: Sc around. [4] Rnd 7: Sc around. [4] Rnd 8: Sc around. [4] Rnd 9: Sc around. [4] Rnd 10: Sc around. [4] Rnd 11: Sc around. [4] Rnd 12: Sc around. [4] Rnd 13: Sc around. [4] Rnd 14: Sc around. [4] Rnd 15: Sc around. [4]
Switch to Seal Brown yarn: Rnd 16: Sc around. [4] Rnd 17: Sc around. [4] Rnd 18: Sc around. [4] Rnd 19: Sc around. [4] Rnd 20: Sc around. [4]
Do not stuff.
FO, leaving a 10-inch tail for sewing to the body base.
💡 Tail Tip: Leave the tail entirely unstuffed so it drapes and curves naturally — a Siamese tail is one of the most elegant features of the breed, and a soft, floppy tail looks infinitely more realistic than a stiff stuffed one.
Assembly
Pin all pieces before sewing and check placement from multiple angles before committing any stitch.
- Embroider the nose with black floss using a small filled triangular satin stitch, centered directly below the safety eyes on Rnd 14 of the head.
- Apply the facial mask embroidery in seal brown yarn, stitching the “V” shape from between the ear attachment points down to just below the eyes, then filling with dense satin stitches.
- Attach the ears wide apart at the outer top edges of the head, angled slightly outward to replicate the Siamese’s wide, dramatic ear set — never place them close together at the crown.
- Sew the head onto the body with the face pointing forward and a very slight forward tilt for a naturally alert, curious posture.
- Attach the front legs symmetrically on either side of the lower chest area, using straight pins to confirm even positioning before sewing a single stitch.
- Attach the back legs toward the lower body sides, angled slightly outward and downward to suggest a seated or standing pose.
- Sew the tail to the base-back of the body, then curve and tack it around to one side for a natural, relaxed resting position.
- Add three to four short whisker lines on each side of the muzzle area using white or cream embroidery floss, stitching straight through the head from side to side.
- Weave in every single end with at least two direction changes, then tug each seam gently to confirm that nothing pulls loose before finishing.
Face Details & Expression Options
The face is what gives your Siamese amigurumi its personality, so consider these four options before placing eyes or embroidering features.
- Classic alert expression: Place 9mm safety eyes between Rnds 10 and 11, exactly 8 stitches apart, for the wide-eyed, intensely curious look most associated with the Siamese breed.
- Breed-signature crossed gaze: Position the safety eyes one stitch closer than standard placement to subtly mimic the traditional slight cross-eye seen in heritage Siamese lines.
- Relaxed sleepy expression: Set the eyes one round lower at Rnd 12 and add a small curved chain-stitch in brown floss beneath each eye to suggest half-lidded drowsiness.
- Child-safe fully embroidered version: Omit safety eyes entirely and use white floss to stitch two small filled oval shapes on Rnd 10, finishing each with a black French knot pupil at the center.
Color Guide
Use this table to match your yarn choice to the major recognized Siamese coat varieties and point colorings.
| Color Variety or Marking | Yarn Recommendation |
|---|---|
| Seal Point — body | Lion Brand Vanna’s Choice “Linen” |
| Seal Point — points | Red Heart Super Saver “Coffee” |
| Blue Point — body | Caron Simply Soft “White” |
| Blue Point — points | Lion Brand Vanna’s Choice “Dusty Blue” |
| Chocolate Point — body | Lion Brand Vanna’s Choice “Linen” |
| Chocolate Point — points | Red Heart Super Saver “Chocolate” |
| Lilac Point — body | Bernat Softee Baby “Soft White” |
| Lilac Point — points | Paintbox Simply DK “Dusty Rose” |
| Flame Point — body | Lion Brand Vanna’s Choice “Ivory” |
| Flame Point — points | Red Heart Super Saver “Carrot” |
| Lynx Point — body | Caron Simply Soft “White” |
| Lynx Point — points | Loops & Threads Impeccable “Taupe” |
| Most Popular on Pinterest | Seal Point |
Beginner Tips
These five tips are specific to crocheting a Siamese amigurumi and will save you real time and frustration at every stage.
- Most important shaping technique: Use the invisible decrease consistently throughout the head decreases — it creates the smooth, flat-topped wedge profile that makes the finished piece instantly recognizable as a Siamese rather than a generic cat.
- Most common beginner mistake: Switching from cream to seal brown yarn too late in a round creates a blurry, uneven color join — always make the color switch on the very last pull-through of the final stitch in the old color.
- Tension advice: Crochet tightly throughout, especially in the pale cream sections — any tension gaps in the ivory stitches will reveal the dark stuffing inside and completely ruin the clean, cool-toned Siamese coat effect.
- Best assembly tip: Pin the ears much wider and further apart than feels natural before committing any sewing stitch — Siamese ears are positioned at the extreme outer edges of the wedge head, not centered at the crown like most amigurumi cat patterns.
- Most rewarding finishing detail: Taking extra care to embroider a clean, symmetrical facial mask in seal brown yarn is the single finishing step that transforms this piece from a generic white cat into an unmistakable Siamese portrait.
Making It Bigger or Smaller
- Mini keychain: Use fingering weight yarn with a US B/1 (2.25mm) hook for a finished size of approximately 2.5 inches; attach to a split ring keychain by looping through a small chain stitch at the crown before weaving in ends.
- Standard size: Follow the pattern exactly as written using worsted weight yarn and a US G/6 (4.0mm) hook for a finished Siamese amigurumi of approximately 6 inches tall.
- Large cuddly version: Use bulky weight yarn (size 5 or 6) with a US K/10.5 (6.5mm) hook for a finished size of approximately 10–12 inches — deeply huggable and ideal as a nursery keepsake.
Safety Notice
- Safety eyes are a choking hazard for children under 3 — always embroider eyes for baby and toddler gifts.
- Weave in every end with at least 2 direction changes to prevent unraveling with use or washing.
- Check all sewn joins are secure before giving to a child.
Free Printable Pattern Download
This pattern is free for personal use and for selling finished handmade items in small quantities — the pattern text must not be reproduced or sold; please link back to this page instead. At a standard 12pt font size, this pattern prints to approximately 5–6 pages.
Frequently Asked Questions
How long does this Siamese cat take to crochet?
Most crocheters complete this pattern in 4 to 8 hours depending on skill level. The facial mask embroidery adds approximately 20 to 30 extra minutes.
Can I use DK weight yarn instead of worsted?
Yes — switch to a US E/4 (3.5mm) hook and the finished cat will measure approximately 4.5 inches. The color-point markings look equally crisp in DK weight.
The color-point markings look blurry and uneven — how do I fix it?
Switch yarn on the very last pull-through of the old color stitch, not one stitch later — this single timing adjustment eliminates blurry joins. Practice the switch on a spare swatch before working the final piece.
Can I substitute the magic ring?
Yes — chain 2 and work your starting stitches into the second chain from the hook as a simple alternative. The magic ring gives a tighter, neater center, but either method works for amigurumi.
How can this pattern be customized to match a specific real-life Siamese?
Swap the point-color yarn to match your real cat’s exact shade — seal, blue, chocolate, or flame — for an instant portrait effect. Custom Siamese commissions typically sell for $35–$75.
Final Thoughts
The Siamese is one of the most rewarding cat breeds to crochet, thanks to its unmistakable two-tone color-point coat. Those dark seal points against a pale ivory body create a bold visual payoff that almost no other breed can match in amigurumi form. The facial mask embroidery requires the most patience in this entire project, but that detail is what transforms a generic white cat plush into a true Siamese portrait. Take your time with those satin stitches — the finished result is absolutely worth every extra minute. Share your finished Siamese on Pinterest and tag it #SiameseCrochet or #AmigurumiCat so other makers can discover this free pattern. Happy crocheting! 🐾