A cat cave is one of those projects that feels impressive but is secretly one of the easiest things you can crochet.
There are no separate pieces to assemble. No safety eyes to insert. No embroidery details. Just one continuous spiral of big, satisfying rounds that builds itself into a cosy dome your cat will claim within minutes of you finishing it.
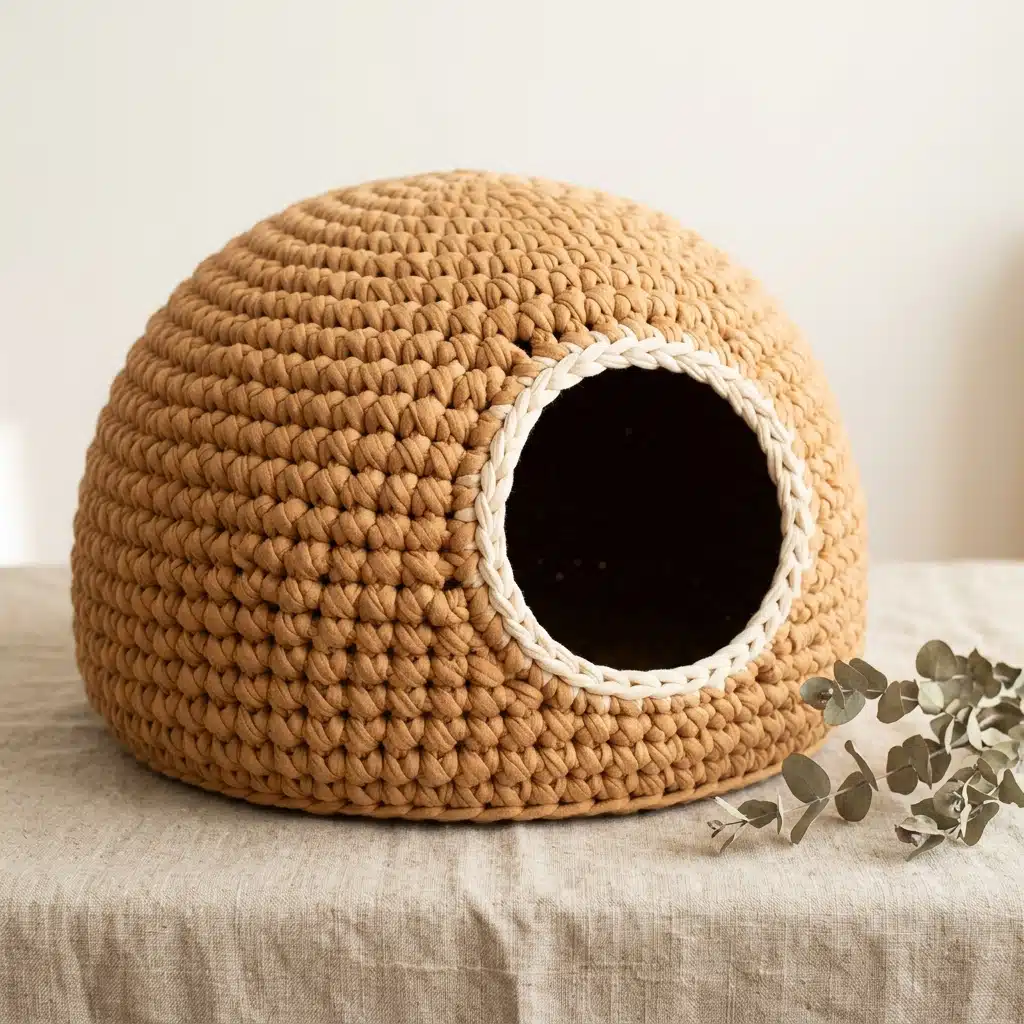
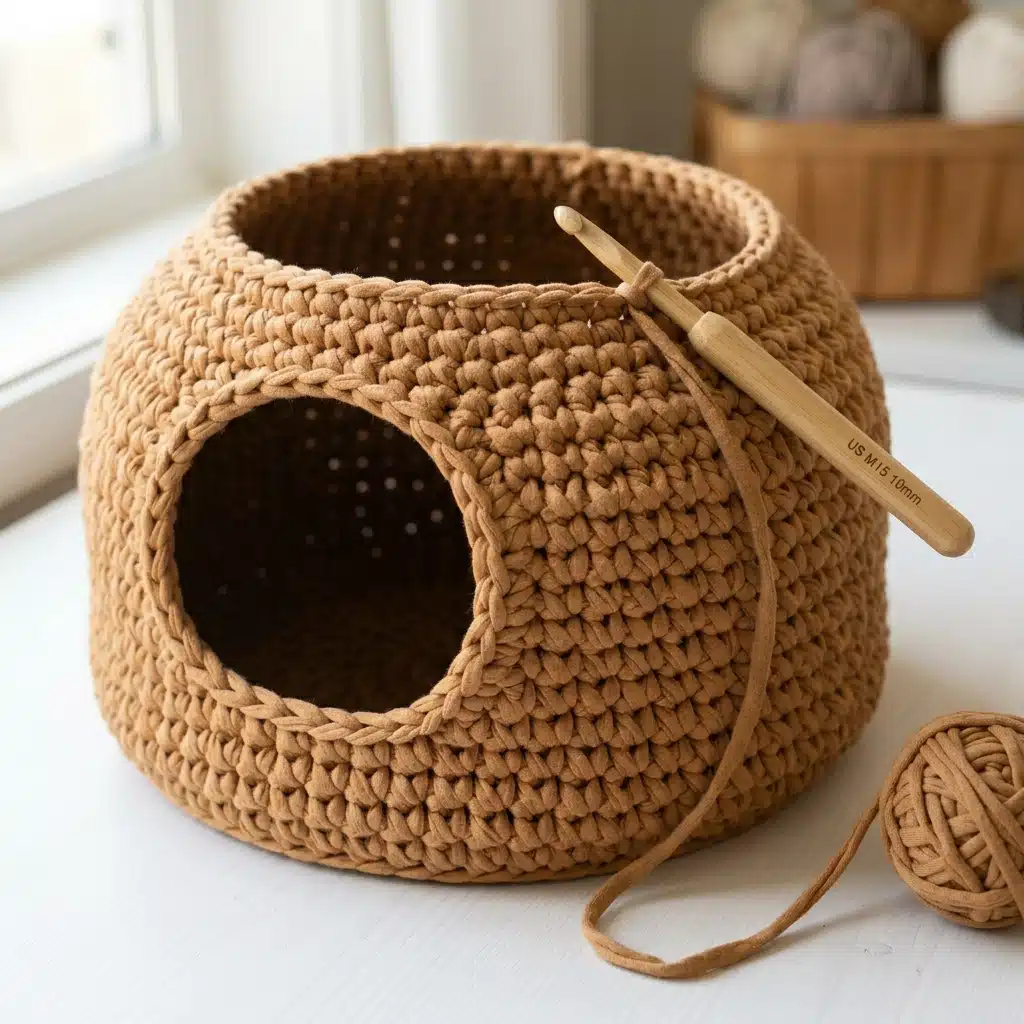
This caramel tan version uses the warm tones that photograph best for home decor — but this pattern includes a full colour guide so you can match any living room or your cat’s personality.
This pattern is 100% free — no email, no sign-up, no download required. It includes full round-by-round instructions, yarn recommendations for both T-shirt yarn and chunky rope yarn, sizing guidance, and all the tips you need to get a clean dome shape with a perfectly round entrance. Let’s get started.
Pattern At A Glance
| Skill Level | Beginner |
| Finished Size | Approx. 12 inches wide × 9 inches tall (fits one average adult cat) |
| Yarn Weight | Super Bulky / Jumbo (#6 or #7) |
| Hook Size | US N/15 (10mm) or US P/16 (11.5mm) |
| Stitch(es) Used | Single crochet, slip stitch, chain |
| Techniques Used | Magic ring, continuous rounds, BLO decrease shaping |
| Time to Complete | 2–4 hours |
| Yarn Needed | Approx. 200–250 yds of super bulky yarn |
| Number of Pieces | 1 — worked entirely in one piece |
| Yarn Types | T-shirt yarn or chunky rope yarn (both covered) |
| Best Occasion / Use | Cat gift, home decor, pet enrichment, housewarming gift |
Why Cats Love a Crochet Cave
Cats are instinctive den animals. In the wild, small enclosed spaces mean safety and warmth.
A crochet cat cave replicates that instinct perfectly — the dome shape retains body heat, the textured yarn surface satisfies a cat’s need to knead, and the single entrance gives them the security of seeing out without being approached from behind.
The chunky crochet construction also creates natural air gaps in the fabric. This makes the cave warm in winter and breathable enough in summer for cats who run hot.
BEFORE YOU SCROLL PAST
Most Popular This Week: 👇
👉 Free Cocker Spaniel Crochet Pattern Beginner Friendly
👉 Border Collie Crochet Pattern Ideas
Materials You Will Need

Gather everything before starting — at super bulky weight, even a small gauge difference between two yarns creates a noticeably different finished size.
Yarn — Choose One Option
Option A — T-Shirt Yarn (most popular)
- Main Colour — Approx. 200–250 yds — Hoooked Zpagetti in “Caramel” or Lion Brand Fettuccini in “Wheat” — T-shirt yarn gives the cave a smooth, tightly woven surface texture that holds its dome shape extremely well and is easy to wipe clean.
Option B — Chunky Rope Yarn
Get Free Patterns Every Week!
Get new patterns, videos & tutorials free in your inbox
🔒 No spam. Unsubscribe anytime.
- Main Colour — Approx. 200–250 yds — Lion Brand Thick & Quick in “Caramel” or Bernat Blanket Extra in “Toasted Coconut” — rope yarn gives a more rustic, open-weave texture with visible stitch definition, and is widely available at most craft stores.
🛒 Yarn Tip: T-shirt yarn is the better choice for durability and shape retention — it washes easily, holds the dome structure without a stiffener, and the finished cave looks more polished in photos. Rope yarn is the better choice for budget and availability. Both work with the same stitch counts.
Tools & Notions
- US N/15 (10mm) crochet hook for T-shirt yarn
- US P/16 (11.5mm) crochet hook for chunky rope yarn
- Stitch marker
- Tapestry needle or large blunt needle
- Scissors
- Optional: non-slip mat or rug grip pad to place inside the base of the finished cave
💡 Hook Tip: For T-shirt yarn specifically, an ergonomic handle hook makes a significant difference — the tension required for this weight yarn over 2–4 hours can fatigue the hand quickly. Susan Bates Silvalume or Clover Amour both come in N/15 and are worth the investment for larger projects.
Abbreviations & Stitch Guide
This pattern uses US crochet terminology throughout.
| Abbreviation | Meaning |
|---|---|
| MR | Magic ring |
| ch | Chain |
| sl st | Slip stitch |
| sc | Single crochet |
| inc | Increase — 2 sc in the same stitch |
| dec | Invisible decrease |
| BLO | Back loop only |
| st(s) | Stitch(es) |
| rnd | Round |
| [ ] | Total stitch count at end of round |
💡 Invisible Decrease Tip: For this pattern, a standard decrease (insert hook through both loops of two consecutive stitches) is acceptable and easier with bulky yarn. The invisible decrease (front loops only) gives a cleaner exterior surface if you want a more polished finish. Either works.
Gauge
Gauge: 7 stitches × 8 rows = 4 inches in single crochet using US N/15 (10mm) hook and super bulky yarn.
For a cat cave, gauge affects the finished size more than it does with amigurumi. A looser gauge = a larger, airier cave. A tighter gauge = a smaller, firmer cave that holds its shape better.
If your cave is coming out larger than 12 inches across at the base, go down one hook size. If it is coming out smaller, go up one hook size.
Free Chunky Crochet Cat Cave Pattern — Complete Instructions
The entire cave is worked in one continuous piece, starting from the base and spiralling upward to close the dome at the top. Use a stitch marker at the beginning of each round and count stitches at the end of every round — in bulky yarn, a missed stitch is easy to catch early and very difficult to fix later.
Base
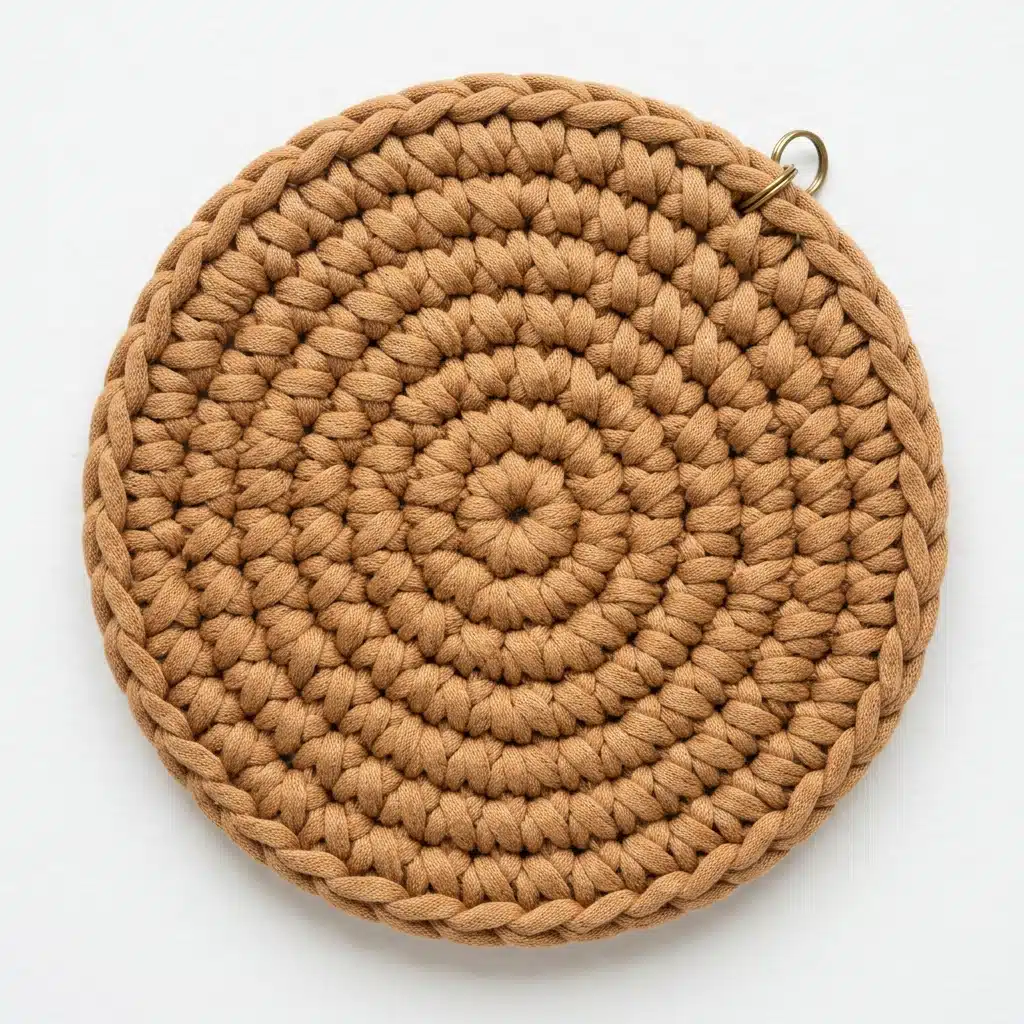
The base is flat and worked in increasing rounds to build the floor of the cave. It should lie completely flat when you finish — if it starts to curl upward at the edges, your tension is too tight.
Rnd 1: MR, 6 sc. [6]
Rnd 2: Inc x6. [12]
Rnd 3: (Sc, inc) x6. [18]
Rnd 4: (2 sc, inc) x6. [24]
Rnd 5: (3 sc, inc) x6. [30]
Rnd 6: (4 sc, inc) x6. [36]
Rnd 7: (5 sc, inc) x6. [42]
Rnd 8: (6 sc, inc) x6. [48]
→ At this point your base should measure approximately 12 inches across. Lay it flat and check. If it measures under 11 inches, work one additional increase round: (7 sc, inc) x6. [54]. If it measures over 13 inches, your tension is too loose — consider going down one hook size for the next project.
💡 Base Tip: The base rounds are the most important rounds in the entire pattern. If the base is not flat, the finished cave will not sit level on the floor and the entrance will tilt forward or backward. Press the base flat with your hand after every 2 rounds and adjust tension if it begins to dome upward.
Walls — Lower Section
The walls are worked straight upward from the base without increasing or decreasing. This creates the vertical sides of the cave before the dome begins to curve inward.
Rnd 9: BLO sc around. [48]
→ Working through the back loop only on this first wall round creates a clean visual ridge that separates the base from the walls — this ridge is visible in the finished piece and gives the cave a professional, intentional look.
Rnd 10: Sc around. [48]
Rnd 11: Sc around. [48]
Rnd 12: Sc around. [48]
Rnd 13: Sc around. [48]
→ At the end of Rnd 13, the walls should measure approximately 3–3.5 inches tall from the base ridge. This is where the entrance opening is worked.
Entrance Opening

The entrance is the most technically satisfying part of this entire pattern — a chain bridge across a gap in the round that creates the perfectly circular doorway your cat will use.
At this point, mark 16 consecutive stitches in the wall round. These 16 stitches will become the entrance opening.
Rnd 14 — Entrance Round:
Sc across the first 16 stitches of the round normally.
At stitch 17, ch 16 (this chain bridges the gap across the entrance).
Skip the next 16 stitches of the round (these are the opening).
Sc across the remaining stitches of the round to complete the round.
→ Count carefully: you are replacing 16 wall stitches with a 16-stitch chain. The total stitch count remains 48 at the end of this round.
Rnd 15: Sc around the entire round, working sc into each chain stitch across the entrance gap exactly as you would work into normal stitches. [48]
→ After Rnd 15, the entrance hole is complete. You should be able to see a clean oval opening in the side of the cave. Pinch the entrance edges gently into a more circular shape while the yarn is still slightly pliable.
💡 Entrance Tip: The entrance opening should be approximately 5–6 inches across when finished — large enough for an average adult cat to enter comfortably without the cat having to squeeze. If your cat is a larger breed (Maine Coon, Ragdoll), increase the entrance chain to 20 stitches and skip 20 stitches.
Walls — Upper Section
Continue working straight rounds above the entrance to build the upper wall section before the dome begins to close.
Rnd 16: Sc around. [48]
Rnd 17: Sc around. [48]
Rnd 18: Sc around. [48]
→ The cave walls should now be approximately 6–6.5 inches tall from the base ridge. If you want a taller cave (for a larger or fluffier cat), add 2 additional straight rounds here before beginning the dome decrease.
Dome — Closing
The dome is worked in decreasing rounds that pull the top of the cave closed into a smooth rounded shape. Work firmly through this section — the decreases need to be snug to hold the dome’s curve under the weight of the finished structure.
Rnd 19: (6 sc, dec) x6. [42]
Rnd 20: Sc around. [42]
Rnd 21: (5 sc, dec) x6. [36]
Rnd 22: Sc around. [36]
Rnd 23: (4 sc, dec) x6. [30]
Rnd 24: Sc around. [30]
Rnd 25: (3 sc, dec) x6. [24]
Rnd 26: (2 sc, dec) x6. [18]
Rnd 27: (Sc, dec) x6. [12]
Rnd 28: Dec x6. [6]
Fasten off, leaving a 10-inch tail. Close the 6-stitch gap at the top with the tapestry needle and weave the end securely into the inside of the dome.
💡 Dome Tip: The dome will naturally want to flatten slightly under its own weight before the yarn sets. After fastening off, place a rounded object inside (a large balloon inflated to about 11 inches, or a small mixing bowl) and leave it for 30 minutes to help the dome hold its curve. This step makes a noticeable difference in the final shape.
Entrance Edging (Optional but Recommended)
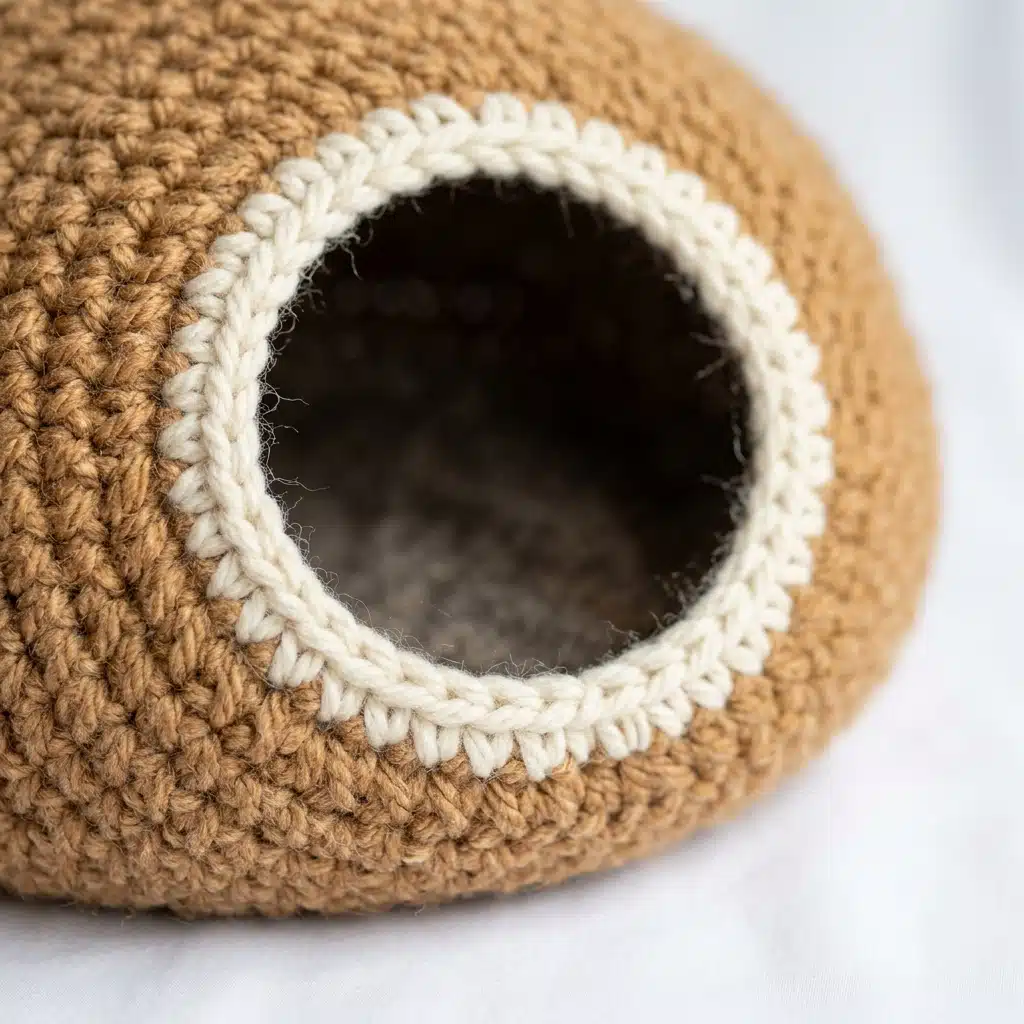
Working a single round of slip stitches around the entrance opening gives the doorway a clean, finished edge and reinforces the opening so it holds its circular shape over time.
Join yarn at any point around the entrance opening.
Work sl st around the entire entrance edge. [approx. 32–36 stitches depending on your gauge]
Fasten off and weave in the end on the inside of the cave.
💡 Edging Tip: For an extra-polished entrance edge, work the edging round in a contrasting colour — a cream edging on a caramel cave, or a grey edging on a cream cave, gives the finished piece a professional boutique look that photographs beautifully.
Shaping & Finishing

A freshly finished chunky crochet cave often needs a small amount of shaping before it reaches its final form.
Blocking the base: Place the cave upside down on a flat surface and press the base firmly with both hands. Working in a circular motion from the centre outward, press any raised or uneven areas flat. T-shirt yarn responds well to this and will hold the shape within minutes.
Shaping the entrance: The entrance opening naturally wants to be slightly oval rather than circular after the edging round. While the yarn is slightly warm from your hands, push the entrance edges gently outward from inside the cave to round them into a circle. Hold for 30 seconds and release.
Weaving ends: There are very few ends in this pattern — just the starting tail and the dome closing tail. Weave both ends securely into the interior of the cave where they are invisible and inaccessible to your cat.
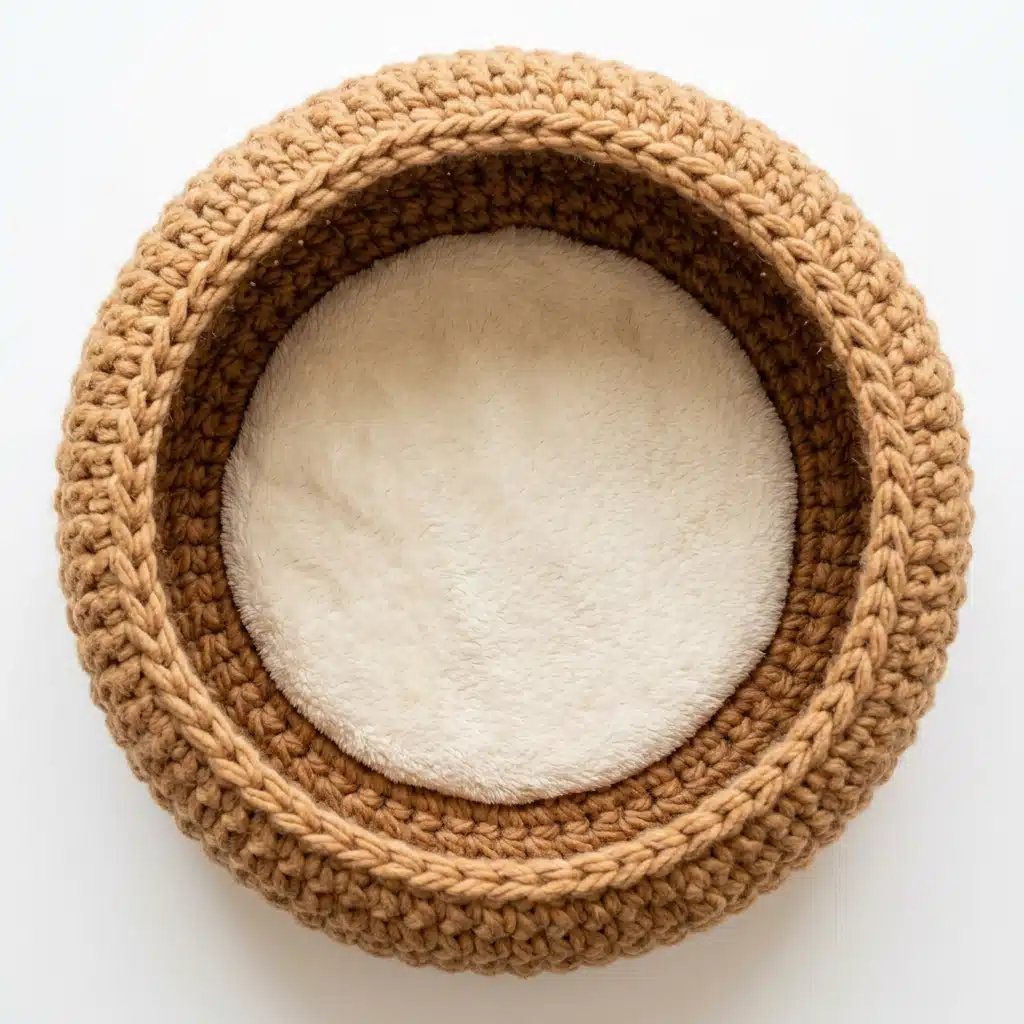
Inside lining (optional): For extra warmth and comfort, cut a circle of fleece fabric to fit the base (approximately 12 inches diameter) and place it flat inside the cave. It does not need to be sewn in — the weight of the cat holds it in place and it can be removed for washing.
Assembly
There is no traditional assembly in this pattern — the cave is worked in one piece from start to finish.
The only joining steps are:
- Close the 6-stitch gap at the top of the dome with the tapestry needle
- Weave in the opening tail at the magic ring base
- Work the optional entrance edging round
That is the entire finishing process. This is what makes the cat cave such a satisfying project — the moment you close the dome, it is finished.
📸 Photo Tip: Place a small orange or tabby cat inside the cave before photographing if possible — a cat peeking out of the entrance is the single most shared image style for this type of project on Pinterest. Shoot at exact entrance level so the dome interior is partially visible.
Beginner Tips for the Best Results
These five tips are specific to chunky cat cave construction and will save significant frustration.
- Most important tension tip: Keep your tension consistent throughout the wall rounds. Inconsistent tension in the walls creates visible horizontal ridges in the finished cave. T-shirt yarn is especially unforgiving of tension changes — try to complete all wall rounds in one sitting if possible.
- Most common beginner mistake: Working the entrance chain too loosely. The 16 chain stitches across the entrance gap should be worked at the same tension as your regular stitches. A loose chain creates a floppy entrance edge that never firms up, even after the edging round.
- Most important shaping advice: The base MUST be flat before you begin the walls. A domed or wavy base cannot be corrected later — it will pull the entire structure out of alignment and the finished cave will rock on a flat surface.
- Best finishing tip: Weave both tails into the interior of the cave, not the exterior. Tails woven into the outside surface create small bumps and loose loops that a curious cat will immediately find and pull.
- Most satisfying detail: The BLO ridge at Rnd 9 takes less than one extra second per stitch but creates a clean professional base-to-wall transition that makes a handmade cave look like a boutique product rather than a home project.
Washing & Care
One of the most practical advantages of a crochet cat cave is how easy it is to clean.
T-shirt yarn caves: Machine washable on a gentle cool cycle. Reshape immediately after washing while damp and allow to air dry flat. Do not tumble dry — the heat can cause T-shirt yarn to shrink unevenly.
Rope yarn caves: Hand wash in cool water with a small amount of wool wash or gentle detergent. Rinse thoroughly and press out excess water without wringing. Reshape and air dry flat.
Frequency: Wash every 2–4 weeks depending on how much your cat uses the cave. A removable fleece liner makes this interval easier to maintain.
Making It Bigger
This pattern produces a cave approximately 12 inches in diameter — ideal for an average adult cat up to about 12 lbs.
- For larger cats (Maine Coon, Ragdoll, British Shorthair): Work 2 additional increase rounds in the base section — (7 sc, inc) x6 [54] and (8 sc, inc) x6 [60] — before beginning the walls. Increase the entrance chain to 20 stitches. Finished size will be approximately 14–15 inches in diameter.
- For kittens or small cats: Stop the base at Rnd 6 [36 stitches] and work the walls and dome from that stitch count. Decrease the entrance chain to 12 stitches. Finished size will be approximately 9–10 inches in diameter — ideal for a kitten or a very small adult cat.
- For a two-cat cave: Work 3 additional increase rounds from the base pattern to reach approximately 18 inches in diameter. Increase the entrance to 24 chain stitches. This size uses approximately 400 yds of yarn.
Colour Guide

The same pattern produces completely different looking caves with a single yarn colour swap. Every colour uses identical stitch counts.
| Colour | T-Shirt Yarn Recommendation | Best Entrance Edging |
|---|---|---|
| Caramel Tan (this pattern) | Hoooked Zpagetti “Caramel” | Cream or ivory |
| Light Grey | Lion Brand Fettuccini “Silver” | White or dark grey |
| Cream / Natural | Hoooked Zpagetti “Ecru” | Caramel or blush |
| Charcoal Dark Grey | Lion Brand Fettuccini “Charcoal” | Light grey or white |
| Dusty Pink | Hoooked Zpagetti “Dusty Rose” | Ivory or white |
| Sage Green | Lion Brand Fettuccini “Sage” | Cream or tan |
| Navy Blue | Hoooked Zpagetti “Midnight” | White or caramel |
| Terracotta | Lion Brand Fettuccini “Clay” | Cream or dark brown |
| Most Popular on Pinterest | Light Grey | White |
Safety Notice
- Always weave in all ends fully on the interior of the cave — any loose yarn ends inside are accessible to your cat and can be ingested if chewed.
- Check the cave structure every few weeks for any pulled loops or loose stitches, especially around the entrance edge where the cat enters and exits repeatedly.
- Do not use yarn that sheds heavily for this project — shedding fibres inside an enclosed space are a respiratory hazard for cats.
- T-shirt yarn and rope yarn are both cat-safe materials, but always supervise a cat’s first few uses of any new item.
Frequently Asked Questions
How long does the cat cave take to crochet?
Most crocheters finish in 2–4 hours. The base takes the longest — approximately 45–60 minutes. Once the walls begin, the rounds go quickly because the stitch count stays constant.
My cave is not holding its dome shape — what do I do?
The most common cause is tension that was too loose in the decrease rounds. Try reshaping the dome by placing a large balloon or rounded bowl inside and leaving it overnight. For a permanent fix, a light spray of fabric stiffener on the exterior (avoiding the entrance area) can hold the shape indefinitely.
Can I use regular chunky yarn instead of T-shirt yarn?
Yes — use a US J/10 (6mm) hook with standard chunky (#5) yarn. The finished cave will be slightly smaller and softer in structure. You may need to add 1–2 extra increase rounds in the base to reach the 12-inch target diameter.
My cat won’t go inside the cave — what should I try?
Place a worn item of your clothing or a favourite toy inside the cave to make it smell familiar. Sprinkle a small amount of dried catnip just inside the entrance. Most cats investigate and begin using a cave within 24–48 hours.
Can I substitute the magic ring?
Yes — chain 4 and join with a slip stitch to form a ring, then work all Rnd 1 stitches into the ring as an alternative.
Can I line the inside of the cave?
Yes — a circle of fleece fabric cut to 12 inches fits perfectly inside the base and adds significant warmth. It does not need to be sewn in place. A folded receiving blanket or small cushion pad also works well.
Can I sell finished caves made from this pattern?
Yes — you may sell finished handmade caves made from this pattern in small quantities. Please credit pethow.co.uk as the pattern source. The pattern text itself may not be reproduced or resold.
Final Thoughts
The chunky crochet cat cave is the project that makes non-crocheters say “you made that?” It looks architecturally complex but is genuinely just circles stacked on circles.
The entrance opening is the one moment that feels like a magic trick — you chain across a gap, work the next round straight over it, and suddenly there is a perfect hole in the side of your cave.
The moment your cat claims it is the best reward any crochet project can give. Share the finished cave on Pinterest with a photo of your cat inside it — that image combination is consistently one of the highest-saved craft posts on the platform. Happy crocheting! 🐾