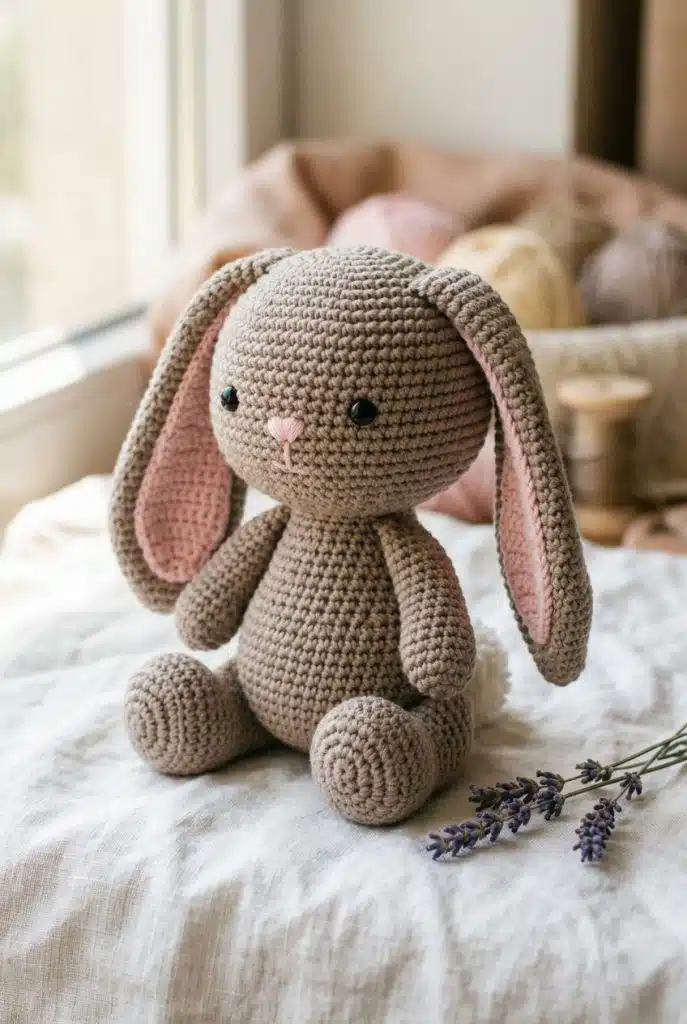
Long-eared bunnies are irresistibly cute because of their floppy ears, rounded cheeks, and tiny bobble tail.
Those soft shapes look especially sweet in yarn, which makes this bunny fun to crochet and even more satisfying to finish.
This pattern is completely free with no sign-up required. It includes full round-by-round instructions, a materials list, assembly steps, and color customization ideas so you can make your bunny look classic or creative.
Let’s get started.
Pattern At a Glance
| Detail | Info |
|---|---|
| Skill Level | Easy to intermediate |
| Finished Size (realistic size in inches) | About 11 inches tall from feet to ear tips |
| Yarn Weight | Worsted weight |
| Hook Size | US G/6 (4.0mm) |
| Techniques Used | Magic ring, single crochet, increase, decrease, working in continuous rounds, basic embroidery |
| Time to Complete | 6 to 8 hours |
| Stuffing Needed | Yes, polyester fiberfill |
| Safety Eyes | 10mm black safety eyes |
| Number of Pieces | 9 pieces |
| Yarn Colors Needed | 2 to 4 colors |
| Seasonal or Gifting Occasion | Easter, spring gifts, baby shower, nursery decor, handmade toy gift |
Materials You Will Need
Gather your yarn, stuffing, and tools before starting so the bunny comes together smoothly.
Yarn
- Main Body Color: 180 to 200 yards, Red Heart Super Saver in Aran, a soft off-white gives a classic bunny look.
- Inner Ear Color: 25 to 30 yards, Caron One Pound in Rose Pink, a gentle pink helps the ears feel more realistic and sweet.
- Tail and Muzzle Accent: 20 yards, Lion Brand Basic Stitch Anti-Pilling in White, bright white makes the tail and muzzle stand out cleanly.
- Optional Clothing or Bow Color: 15 to 20 yards, Loops & Threads Impeccable in Soft Taupe, this works well if you want subtle contrast without losing the bunny feel.
- Fantasy Color Suggestion: Try Bernat Super Value in Lavender with a pale mint inner ear for a dreamy storybook bunny.
Tools & Notions
- Hook: US G/6 (4.0mm)
- Stuffing: Polyester fiberfill
- Eyes: 10mm black safety eyes
- Basic Tools: Yarn needle, stitch markers, scissors, straight pins
- Extras: Pink embroidery floss, black embroidery floss, optional floral wire or pipe cleaner for poseable ears
🛒 Yarn Tip: For the best long-eared bunny shape, choose a smooth worsted yarn from Joann or Michaels instead of fluffy yarn so the ears, face, and stitch definition stay clear.
Abbreviations & Stitch Guide
This pattern uses US crochet terminology.
| Abbreviation | Meaning |
|---|---|
| MR | magic ring |
| ch | chain |
| sl st | slip stitch |
| sc | single crochet |
| hdc | half double crochet |
| inc | 2 sc in the same stitch |
| dec | invisible decrease |
| BLO | back loop only |
| FLO | front loop only |
| st(s) | stitch(es) |
| rnd | round |
| ( ) x# | repeat the sequence that number of times |
| [ ] | total stitch count at end of round |
| 💡 Stitch Tip: The bunny’s ears look neater when decreases are worked invisibly and the opening edge is kept flat, so count carefully and avoid pulling the yarn too tightly at the ear base. |
Gauge
Gauge: 4 stitches x 4 rows = 1 inch in single crochet using US G/6 (4.0mm) and worsted weight yarn.
Use tight firm tension for stuffed pieces so the filling does not show through.
BEFORE YOU SCROLL PAST
Most Popular This Week: 👇
👉 Free Cocker Spaniel Crochet Pattern Beginner Friendly
👉 Border Collie Crochet Pattern Ideas
Free Bunny Crochet Pattern — Complete Instructions

The pieces are made separately and assembled at the end, worked in continuous rounds with no slip stitch joins, so use a stitch marker at the start of each round and count stitches every round.
Head
A bunny’s head is softly rounded with gentle cheeks that make the face look sweet and cuddly.
Rnd 1: MR, 6 sc into ring. [6]
Rnd 2: inc in each st around. [12]
Rnd 3: (sc, inc) x6. [18]
Rnd 4: (2 sc, inc) x6. [24]
Rnd 5: (3 sc, inc) x6. [30]
Rnd 6: (4 sc, inc) x6. [36]
Rnd 7: (5 sc, inc) x6. [42]
Rnd 8: (6 sc, inc) x6. [48]
Rnd 9: (7 sc, inc) x6. [54]
Rnd 10: (8 sc, inc) x6. [60]
Rnd 11: sc around. [60]
Rnd 12: sc around. [60]
Rnd 13: sc around. [60]
Rnd 14: sc around. [60]
Rnd 15: sc around. [60]
Rnd 16: sc around. [60]
Rnd 17: (8 sc, dec) x6. [54]
Rnd 18: (7 sc, dec) x6. [48]
Rnd 19: (6 sc, dec) x6. [42]
Rnd 20: (5 sc, dec) x6. [36]
Place safety eyes between Rnds 14 and 15, about 8 stitches apart. [36]
Rnd 21: (4 sc, dec) x6. [30]
Start stuffing firmly and shape the cheeks evenly. [30]
Rnd 22: (3 sc, dec) x6. [24]
Rnd 23: (2 sc, dec) x6. [18]
Rnd 24: (sc, dec) x6. [12]
Rnd 25: dec x6. [6]
Fasten off, close opening, and leave a short tail for weaving in. [6]
🐰 Tip: Put a little extra stuffing in the lower front of the head so the bunny gets soft cheeks instead of a flat face.
Muzzle
The muzzle gives the bunny its gentle nose area and helps the embroidered face stand out.
Rnd 1: MR, 6 sc into ring. [6]
Rnd 2: inc in each st around. [12]
Rnd 3: (sc, inc) x6. [18]
Rnd 4: sc around. [18]
Rnd 5: (sc, dec) x6. [12]
Add a tiny pinch of stuffing only if you want a raised muzzle. [12]
Fasten off and leave a long tail for sewing. [12]
Get Free Patterns Every Week!
Get new patterns, videos & tutorials free in your inbox
🔒 No spam. Unsubscribe anytime.
Body
The body is pear-shaped, slightly wider at the bottom, which helps the bunny sit nicely.
Rnd 1: MR, 6 sc into ring. [6]
Rnd 2: inc in each st around. [12]
Rnd 3: (sc, inc) x6. [18]
Rnd 4: (2 sc, inc) x6. [24]
Rnd 5: (3 sc, inc) x6. [30]
Rnd 6: (4 sc, inc) x6. [36]
Rnd 7: (5 sc, inc) x6. [42]
Rnd 8: sc around. [42]
Rnd 9: sc around. [42]
Rnd 10: sc around. [42]
Rnd 11: (5 sc, dec) x6. [36]
Rnd 12: sc around. [36]
Rnd 13: (4 sc, dec) x6. [30]
Rnd 14: sc around. [30]
Rnd 15: (3 sc, dec) x6. [24]
Rnd 16: sc around. [24]
Start stuffing firmly, especially the base, so the bunny can sit better. [24]
Rnd 17: (2 sc, dec) x6. [18]
Rnd 18: sc around. [18]
Rnd 19: (sc, dec) x6. [12]
Rnd 20: sc around. [12]
Fasten off and leave a long tail for sewing to the head. [12]
🐰 Tip: A flat, well-stuffed base helps this bunny look balanced, so press gently on the bottom while stuffing to keep the shape stable.
Ears (Make 2)
Long ears are the star feature of this bunny, hanging down softly with a narrow top and wider lower section.
Rnd 1: MR, 6 sc into ring. [6]
Rnd 2: (sc, inc) x3. [9]
Rnd 3: sc around. [9]
Rnd 4: (2 sc, inc) x3. [12]
Rnd 5: sc around. [12]
Rnd 6: (3 sc, inc) x3. [15]
Rnd 7: sc around. [15]
Rnd 8: sc around. [15]
Rnd 9: (4 sc, inc) x3. [18]
Rnd 10: sc around. [18]
Rnd 11: sc around. [18]
Rnd 12: sc around. [18]
Rnd 13: sc around. [18]
Rnd 14: (4 sc, dec) x3. [15]
Rnd 15: sc around. [15]
Rnd 16: sc around. [15]
Rnd 17: (3 sc, dec) x3. [12]
Rnd 18: sc around. [12]
Do not stuff the ears unless a lightly structured look is preferred. [12]
Flatten the opening and crochet 6 sc through both layers to close. [6]
Fasten off and leave a long tail for sewing. [6]
🐰 Tip: Fold each ear slightly at the base before sewing so it curves forward naturally like a real floppy bunny ear.
Front Limbs (Make 2)
The front limbs are slim and simple, sitting close to the body for a cuddly toy look.
Rnd 1: MR, 6 sc into ring. [6]
Rnd 2: (sc, inc) x3. [9]
Rnd 3: sc around. [9]
Rnd 4: sc around. [9]
Rnd 5: sc around. [9]
Rnd 6: sc around. [9]
Rnd 7: sc around. [9]
Lightly stuff only the lower half. [9]
Flatten opening and crochet 4 sc through both layers. [4]
Fasten off and leave a long tail for sewing. [4]
Back Legs (Make 2)
The back legs are slightly chunkier so the bunny can sit with a soft rounded lower body.
Rnd 1: MR, 6 sc into ring. [6]
Rnd 2: inc in each st around. [12]
Rnd 3: (sc, inc) x6. [18]
Rnd 4: sc around. [18]
Rnd 5: sc around. [18]
Rnd 6: (sc, dec) x6. [12]
Rnd 7: sc around. [12]
Stuff the foot and lower leg firmly, leaving the top softer. [12]
Flatten opening and crochet 6 sc through both layers. [6]
Fasten off and leave a long tail for sewing. [6]
Tail
The tail is a tiny round pom-pom shape that gives the bunny its classic playful finish.
Rnd 1: MR, 6 sc into ring. [6]
Rnd 2: inc in each st around. [12]
Rnd 3: sc around. [12]
Rnd 4: dec x6. [6]
Stuff lightly. [6]
Fasten off and leave a long tail for sewing. [6]
Assembly
Pin all pieces before sewing and check from multiple angles before committing any stitch.
- Embroider the nose, mouth, and optional cheek details on the muzzle first, then sew the muzzle centered between the eyes on the lower half of the head.
- Attach the ears to the top sides of the head between Rnds 4 and 8, spacing them evenly so they frame the face and droop naturally.
- Sew the head to the body securely, keeping the head slightly forward for a gentle seated bunny posture.
- Sew the front limbs to the upper body just below the neck so they angle slightly inward.
- Attach the back legs low on the body sides so the bunny can sit with a rounded base.
- Sew the tail to the back center of the body slightly above the base for the cutest profile.
- Add any extra details such as a bow, tiny flower, or blush embroidery after the main pieces are attached.
- Weave in all ends securely and check each join with a gentle tug before gifting or displaying.
📸 Photo Tip: The bunny’s floppy ears photograph best for Pinterest, so style it sitting beside a small basket, tulips, or pastel eggs for a bright spring-themed image.
Color Ideas — Make It Your Own
This bunny looks adorable in natural shades, but it also gives plenty of room for playful color combinations.
Realistic Colors
- Classic White: Lion Brand Basic Stitch Anti-Pilling in White.
- Soft Cream: Red Heart Super Saver in Aran.
- Light Gray Bunny: Caron One Pound in Light Gray Mix.
- Warm Brown Bunny: Loops & Threads Impeccable in Soft Taupe.
Fantasy & Creative Colors
- Rainbow Bunny: Use a self-striping rainbow yarn for the body and solid white for the muzzle and tail to create a cheerful statement piece.
- Pastel Bunny: Combine lavender, blush pink, baby blue, and mint for a nursery-friendly bunny with soft storybook charm.
- Halloween Bunny: Try black, purple, and orange with glowing green eyes for a playful spooky-season version.
- Galaxy Bunny: Use deep navy, purple, and silver accents to create a cosmic bunny that feels magical and dramatic.
- Seasonal Bunny: Make spring versions in lemon and pink, autumn versions in rust and cream, or winter versions in icy blue and white.
🎨 Color Tip: A pastel pink and cream bunny will usually perform best on Pinterest because the soft spring palette instantly matches Easter, nursery, and gift-search trends.
Beginner Tips for the Best Results
A few bunny-specific details will make a big difference in how polished the finished toy looks.
- Ear Shape: The most important challenge is keeping both long ears the same length, so count every round and compare them before fastening off.
- Most Common Mistake: Beginners often place the ears too close together, so pin them first and check the face from the front before sewing.
- Tension Control: Keep firm tension on all stuffed pieces so the bunny holds its shape and no stuffing peeks through.
- Assembly Placement: Sew the back legs low and slightly forward so the bunny sits better and does not tip backward.
- Best Reward: The most satisfying moment is attaching the floppy ears because that is when the bunny’s personality really appears.
Safety Notice
- Safety Eyes: Safety eyes are a choking hazard for children under 3 — always embroider eyes for baby and toddler gifts.
- Ends: Weave in every end with at least 2 direction changes.
- Joins: Check all sewn joins are secure before giving to a child.
Frequently Asked Questions
How long does this bunny take to crochet?
Most crocheters can finish this bunny in about 6 to 8 hours. The exact time depends on experience and how much detail is added.
Can I use DK weight yarn instead of worsted?
Yes, but the bunny will come out smaller. Use a slightly smaller hook and keep tension firm so the stuffed pieces stay neat.
My bunny ears twist or sit unevenly — how do I fix it?
Pin both ears in place first and compare them from the front, side, and top. A small fold at the base also helps both ears drape more evenly.
Can I substitute the magic ring?
Yes, chain 2 and work the starting stitches into the second chain from the hook. That method works well if the magic ring feels tricky.
Can I sell finished bunnies made from this pattern?
Yes, finished handmade bunnies can usually be sold in small batches. It is still best to credit the pattern inspiration when sharing online listings or posts.
More Free Crochet Patterns You’ll Love
These pattern ideas pair beautifully with a long-eared bunny theme and make a sweet collection.
- Bunny Crochet Pattern Ideas (5 Inspiring Designs)
- Free Baby Chick Crochet Pattern
- Free Crochet Easter Basket Pattern
- Lamb Crochet Pattern Free
- Free Crochet Carrot Pattern
- Teddy Bear Crochet Pattern Free
- Free Crochet Bow Pattern
- Spring Amigurumi Crochet Pattern Ideas
Final Thoughts
A long-eared bunny is especially rewarding to crochet because those floppy ears, soft rounded cheeks, and tiny tail give the finished piece so much charm. Even in simple yarn colors, the shape feels warm, playful, and full of personality.
The part that takes the most patience is getting the ears matched and positioned just right. Once they are attached, the whole bunny comes to life, and the finished result is worth every stitch, especially when made in several different colors. Happy crocheting! 🧶