The Cockapoo is one of the most irresistible dogs in the world — and in yarn, it is pure magic. Those signature floppy, wavy ears, the round teddy-bear face, and that fluffy, cloud-like coat are everything a crocheter dreams of recreating. The mix of textures — smooth muzzle, loopy curly body, silky ear drape — makes a Cockapoo amigurumi genuinely satisfying to build stitch by stitch. Whether you are a longtime dog lover or simply drawn to the cuteness overload, this little pup delivers a finished piece that makes everyone stop and smile.
This pattern is perfect for intermediate crocheters who want a real wow-factor project. Cockapoo lovers are famously devoted — this breed has one of the most passionate fan communities online — which makes a handmade Cockapoo the ultimate heartfelt gift. It is ideal for birthdays, new puppy celebrations, dog memorial gifts, or as a holiday present for the Cockapoo parent in your life.
On Pinterest, Cockapoo crochet consistently performs brilliantly because the finished piece is so recognizable and so photogenic — those loopy ears and button eyes stop a scroll every single time.
The best news? This pattern is completely free to download and print, with no email sign-up or account required. Everything you need is right here: full round-by-round instructions for every single piece, a complete materials list, a step-by-step assembly guide, and color customization ideas covering every Cockapoo coat shade — plus some fun fantasy color options for the creatively adventurous. Let’s get started.
Pattern At A Glance
| Skill Level | Intermediate |
| Finished Size | Approximately 6 inches tall seated |
| Yarn Weight | Worsted Weight (Category 4) |
| Hook Size | US G/6 (4.0mm) |
| Techniques Used | Magic ring, single crochet, increases, decreases, BLO, loop stitch, invisible decrease |
| Time to Complete | 8–12 hours |
| Stuffing Needed | Yes — approximately 1.5 oz polyester fiberfill |
| Safety Eyes | 12mm brown or black; or embroider for child-safe version |
| Number of Pieces | Head, muzzle, body, 2 ears, 2 front legs, 2 back legs, tail, optional topknot |
| Yarn Colors Needed | Main coat color + cream/white for muzzle, optional accent for nose |
| Seasonal or Gifting Occasion | Birthday, New Puppy Gift, Dog Memorial, Christmas, Any Occasion |
Materials You Will Need
Gathering your supplies before you begin makes the whole process smoother and more enjoyable. Everything listed here is available at US craft stores or online.
Yarn
- Main Coat Color (approx. 120–150 yards): Body, head, ears, legs, and tail. Lion Brand Pound of Love “Butterscotch,” Red Heart Soft “Toast,” or Caron Simply Soft “Autumn Red” for apricot/golden Cockapoos. For chocolate: Lion Brand Pound of Love “Chocolate” or Red Heart Super Saver “Coffee.” For cream: Bernat Blanket “Vintage White.”
- Muzzle / Accent Color (approx. 15–20 yards): A lighter cream or off-white for the muzzle panel. Lion Brand Pound of Love “Fisherman” or Loops & Threads Impeccable “Aran” blends naturally with most coat shades.
- Nose Accent (approx. 5 yards): Black or dark brown for embroidering the nose. Any dark worsted scrap works perfectly.
- Fantasy Color Option — Cotton Candy Cockapoo: Paintbox Simply DK “Bubblegum Pink” for the main coat and “Baby Blue” for the muzzle. A lavender Cockapoo in Hobby Lobby I Love This Yarn “Lavender” with a pale yellow muzzle is another Pinterest-stopping combination.
🛒 Yarn Tip: For the most realistic loopy Cockapoo coat texture, choose a yarn that splits slightly — Caron Simply Soft and Lion Brand Pound of Love both grip the hook just right for clean loop stitches. Find them at Joann, Hobby Lobby, Michaels, Walmart, or Amazon US.
Tools & Notions
- US G/6 (4.0mm) crochet hook — main hook for all pieces
- US B/1 (2.25mm) crochet hook — optional, for very small accent details
- Polyester fiberfill stuffing — approximately 1.5 oz
- Two 12mm safety eyes in brown or black
- Yarn needle (blunt tip) for sewing pieces together
- Stitch markers — at least 3
- Sharp scissors
- Straight pins for positioning pieces before sewing
- Small amount of black embroidery floss for nose and mouth
- Pipe cleaners (optional) — to give floppy ears a poseable drape
Abbreviations & Stitch Guide
This pattern uses US crochet terminology throughout.
| Abbreviation | Meaning |
| MR | Magic ring |
| ch | Chain |
| sl st | Slip stitch |
| sc | Single crochet |
| inc | Increase (2 sc in same stitch) |
| dec | Invisible decrease (insert hook in front loops of next 2 sts, pull through, complete sc) |
| BLO | Back loop only |
| FLO | Front loop only |
| ls | Loop stitch |
| hdc | Half double crochet |
| st(s) | Stitch(es) |
| rnd | Round |
| ( ) x# | Repeat instructions in brackets the stated number of times |
| [ ] | Stitch count at end of round |
💡 Stitch Tip: The loop stitch gives your Cockapoo its signature curly, fluffy coat. Insert hook, wrap yarn around your index finger to create a loop, pull both strands through the stitch, then complete as a single crochet. Keep loops roughly 1 inch long. Practice on a small swatch before starting the body.
Gauge
Gauge: 4 stitches x 4 rows = 1 inch in single crochet using US G/6 (4.0mm) hook and worsted weight yarn.
Tight, consistent tension is especially important for stuffed amigurumi pieces like the head and body. If your tension is too loose, you will be able to see the stuffing through the stitches. Work slightly tighter than feels natural, or drop down to a US F/5 (3.75mm) hook if your natural tension runs loose.
Free Cockapoo Crochet Pattern — Complete Instructions

All pieces are made separately and assembled at the end. Work in continuous rounds unless otherwise stated — do not slip stitch to join at the end of rounds. Use a stitch marker to mark the first stitch of each round and move it up as you work. Count every single round before moving on.
Head
The Cockapoo’s head is the star of the whole piece — round and generously sized with that sweet, wide-set face. The head should be noticeably larger in proportion to the body, just like a real Cockapoo pup.
Rnd 1: MR, 6 sc into ring. [6]
Rnd 2: Inc in each st around. [12]
Rnd 3: (Sc, inc) x6. [18]
Rnd 4: (Sc 2, inc) x6. [24]
Rnd 5: (Sc 3, inc) x6. [30]
Rnd 6: (Sc 4, inc) x6. [36]
Rnd 7: (Sc 5, inc) x6. [42]
Rnd 8: (Sc 6, inc) x6. [48]
Rnd 9–15: Sc around. [48] (7 rounds)
Rnd 16: (Sc 6, dec) x6. [42]
Rnd 17: (Sc 5, dec) x6. [36]
Insert safety eyes between rounds 11 and 12, approximately 10 stitches apart. Attach the muzzle piece and embroider the nose before continuing to close the head.
Rnd 18: (Sc 4, dec) x6. [30]
Rnd 19: (Sc 3, dec) x6. [24]
Stuff the head firmly and evenly now.
Rnd 20: (Sc 2, dec) x6. [18]
Rnd 21: (Sc, dec) x6. [12]
Rnd 22: Dec x6. [6]
Fasten off, leaving a 6-inch tail. Close the opening and weave in the end. Set head aside.
🐾 Head Tip: The Cockapoo’s eyes sit closer together than you might expect — start with them 10 stitches apart and check the look before securing the washers. Moving them just one or two stitches changes the expression entirely.
Muzzle
The muzzle is a soft, rounded cushion that sits in the lower third of the face, giving the Cockapoo its characteristic gentle, slightly protruding snout.
Work in cream or accent color.
Rnd 1: MR, 6 sc into ring. [6]
Rnd 2: Inc in each st around. [12]
Rnd 3: (Sc, inc) x6. [18]
Rnd 4: (Sc 2, inc) x6. [24]
Rnd 5–6: Sc around. [24]
Do not stuff. Fasten off, leaving a 15-inch tail for sewing. Embroider the nose with black embroidery floss before attaching: work a small rounded triangle of satin stitch at the top center of the muzzle. Add a short vertical line down and a gentle “V” smile beneath it.
💡 Muzzle Tip: Lightly stuff or don’t stuff the muzzle at all — too much stuffing makes it stick out too far and loses the Cockapoo’s soft, rounded face profile. A small pinch of fiberfill is plenty.
Body
The Cockapoo body is compact and slightly pear-shaped — wider at the hips than the shoulders. Use loop stitch throughout the body for the curly coat texture that makes this breed so recognizable.
Rnd 1: MR, 6 sc into ring. [6]
Rnd 2: Inc in each st around. [12]
Rnd 3: (Sc, inc) x6. [18]
Rnd 4: (Sc 2, inc) x6. [24]
Rnd 5: (Sc 3, inc) x6. [30]
Rnd 6: (Sc 4, inc) x6. [36]
Rnd 7–10: Ls (loop stitch) around. [36] (4 rounds)
Rnd 11: (Sc 4, dec) x6. [30]
Rnd 12–14: Ls around. [30] (3 rounds)
Rnd 15: (Sc 3, dec) x6. [24]
Rnd 16–17: Ls around. [24] (2 rounds)
Begin stuffing firmly. Continue adding stuffing as you close.
Rnd 18: (Sc 2, dec) x6. [18]
Rnd 19: (Sc, dec) x6. [12]
Rnd 20: Dec x6. [6]
Fasten off, leaving a 6-inch tail. Close the opening.
🐾 Body Tip: Keep your loop stitches on the outside (public side) of the work as you crochet. The loops will naturally fall to the outside as you work from the bottom up — check every few rounds that they are facing outward.
Ears (Make 2)
Cockapoo ears are long, floppy, and slightly wavy — one of the breed’s most distinctive features. These are worked in rows to create the flat, flowing shape.
Work in the main coat color. Chain 7 to begin.
Row 1: Sc in 2nd ch from hook, sc across. [6] Turn.
Row 2: Ch 1, inc, sc 4, inc. [8] Turn.
Row 3: Ch 1, sc across. [8] Turn.
Row 4: Ch 1, inc, sc 6, inc. [10] Turn.
Row 5–10: Ch 1, sc across. [10] Turn. (6 rows)
Row 11: Ch 1, dec, sc 6, dec. [8] Turn.
Row 12: Ch 1, sc across. [8] Turn.
Row 13: Ch 1, dec, sc 4, dec. [6] Turn.
Row 14: Ch 1, dec, sc 2, dec. [4] Turn.
Row 15: Ch 1, dec x2. [2]
Fasten off, leaving a 12-inch tail for sewing. For loop-stitch ears, work rows 5–10 in loop stitch instead of plain sc.
🐾 Ear Tip: Thread a pipe cleaner along the center spine of each ear before sewing on. This lets you pose the ears at just the right floppy angle — slightly forward and curved down — for a lifelike Cockapoo silhouette that photographs beautifully.
Front Legs (Make 2)
Short, sturdy front legs — the paw end is slightly rounded to suggest the Cockapoo’s compact feet.
Rnd 1: MR, 6 sc into ring. [6]
Rnd 2: Inc in each st around. [12]
Rnd 3: Sc in BLO around. [12]
Rnd 4–5: Sc around. [12] (2 rounds)
Rnd 6: Dec x2, sc 8. [10]
Rnd 7–12: Sc around (or ls around for fluffy look). [10] (6 rounds)
Stuff lightly. Fasten off, leaving a 12-inch sewing tail.
Back Legs (Make 2)
The back legs are slightly chunkier and longer than the front, giving the seated Cockapoo its stable, grounded posture.
Rnd 1: MR, 8 sc into ring. [8]
Rnd 2: Inc in each st around. [16]
Rnd 3: Sc in BLO around. [16]
Rnd 4–5: Sc around. [16] (2 rounds)
Rnd 6: (Sc 2, dec) x4. [12]
Rnd 7–13: Sc around (or ls around for fluffy look). [12] (7 rounds)
Stuff moderately. Fasten off, leaving a 12-inch sewing tail.
Tail
The Cockapoo tail is a cheerful, upright little plume — fluffy and full of personality.
Rnd 1: MR, 6 sc into ring. [6]
Rnd 2: Inc in each st around. [12]
Rnd 3–4: Ls around. [12] (2 rounds)
Rnd 5: Dec x6. [6]
Stuff lightly. Fasten off, leaving a 10-inch sewing tail.
Optional Topknot
The signature Cockapoo topknot — the little tuft of hair between the ears — makes this breed instantly recognizable.
Rnd 1: MR, 6 sc into ring. [6]
Rnd 2: Inc in each st around. [12]
Rnd 3–4: Ls around. [12] (2 rounds)
Do not stuff. Fasten off, leaving a 10-inch sewing tail. Attach to the top of the head between the ears.
Assembly — Putting Your Cockapoo Together

Pin every single piece in place before you commit a single stitch. Step back and look from all angles — front, side, and from above — before sewing. This extra step takes five minutes and saves twenty.
- Embroider the face. Before attaching the muzzle to the head, embroider the nose — a small rounded triangle of black satin stitch at the top center of the muzzle — then the mouth: a short vertical line down, then a gentle curved “V” smile.
- Attach the muzzle. Center the muzzle in the lower third of the face, between rounds 10–16. The top of the muzzle should sit just below the safety eyes. Pin, then sew all the way around using the long tail and mattress stitch.
- Attach the safety eyes. Press the safety eye posts through the head between rounds 11–12, about 10 stitches apart, flanking the top edge of the muzzle. Secure the washers firmly on the inside.
- Attach the head to the body. Position the head on the top of the body, tilted very slightly forward for a natural, attentive expression. The head should overlap the body opening by about 3–4 stitches. Pin and sew all the way around. A slight forward tilt reads as alert and curious.
- Attach the ears. Pin the ears to the sides of the head, starting at approximately round 6 from the top. The ears should fall forward and drape downward. Sew firmly along the top edge of each ear.
- Attach the back legs. Position on either side of the lower body, pointing slightly outward and forward so the paw sits flat on the surface for a stable seated pose. Sew firmly through the body.
- Attach the front legs. Position on either side of the body at approximately shoulder level — about one-third of the way down from the neck join. Angle them slightly downward and forward.
- Attach the tail. Sew the tail to the back of the body at the base — center it and angle it slightly upward so it looks perky and expressive.
- Attach the topknot (if made). Center the topknot between the ears, at the very top of the head. Sew securely.
- Weave in all ends with direction changes to secure them. Give the finished piece a gentle fluff — pull the loop stitches outward to open up the coat texture.
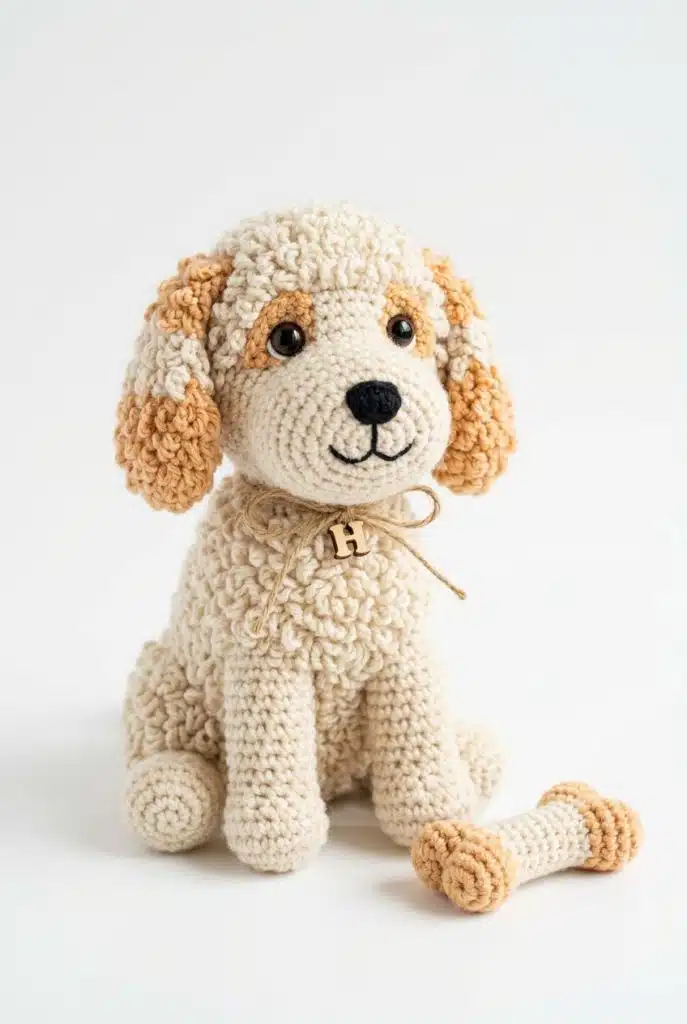
📸 Photo Tip: The Cockapoo’s ears and loopy coat are the most Pinterest-stopping features — position your finished doll on a light neutral background (white foam board or light wood surface) with natural window light from one side. A tiny crochet bone or ball beside the doll adds scale and sweetness and consistently boosts saves.
Face Details & Expression Options
[IMAGE: Four Cockapoo amigurumi heads side by side showing different expressions — classic, sleepy, surprised, and big-eyed Pinterest version]
The face is where your Cockapoo comes to life. Small changes in eye placement or embroidery create completely different personalities — from solemn and soulful to goofy and wide-eyed.
- Classic Cockapoo expression: Safety eyes placed 10 stitches apart between rounds 11–12, with an embroidered nose and gentle curved mouth below. Captures the breed’s calm, intelligent gaze.
- Pinterest-popular big-eyed version: Use 14mm safety eyes placed just 8 stitches apart, one round lower (rounds 12–13). This exaggerates the puppy-dog look that stops scrollers cold — the version most likely to get repinned.
- Sleepy or relaxed variant: Replace safety eyes with two short horizontal stitches in black embroidery floss — small curved lines like half-moon eyes. Creates a contented, snoozing Cockapoo perfect for nursery gifts.
- Surprised or wide-eyed variant: Use 15–16mm eyes placed slightly higher (rounds 10–11) and further apart (12 stitches). Add a small “O”-shaped embroidered mouth instead of a smile for maximum comedic effect.
- Child-safe fully embroidered version: Use black embroidery floss and satin stitch to create two solid circular eyes, approximately 8mm in diameter. Add a tiny white satin stitch highlight dot in the upper right of each eye for depth and life. Completely safe for babies — no removable parts.
Color Ideas & Customization — Make It Your Own
[IMAGE: Row of six Cockapoo amigurumi in different colors — apricot, chocolate, cream, black and white parti, pink fantasy, and galaxy colorway]
One of the great joys of a Cockapoo pattern is the enormous range of real coat colors this breed naturally comes in — plus complete creative freedom to go far beyond nature.
Realistic Color Options
- Apricot / Golden: The most iconic Cockapoo coat. Lion Brand Pound of Love “Butterscotch” or Caron Simply Soft “Autumn Red” — the warm amber tones are spot-on.
- Chocolate / Brown: Rich, deep brown for a chocolate Cockapoo. Red Heart Super Saver “Coffee” or Lion Brand Pound of Love “Chocolate” both nail this shade.
- Cream / Champagne: Soft and elegant. Bernat Blanket “Vintage White” or Lion Brand Pound of Love “Fisherman” with a pure white muzzle.
- Black: Dramatic and striking. Red Heart Super Saver “Black” with a cream muzzle accent. Add a tiny brush of silver loop stitches on the muzzle for an older dog look.
- Black and White Parti: Work the body in black with white patches applied as flat surface pieces. Hobby Lobby I Love This Yarn “Black” and “White” are affordable and widely available.
Fantasy & Creative Color Options
- Cotton Candy Pink: Paintbox Simply DK “Bubblegum Pink” — an instant bestseller at craft fairs and wildly popular with young crocheters on Pinterest.
- Lavender Dream: Hobby Lobby I Love This Yarn “Lavender” main coat with a pale yellow muzzle. Ethereal and unique.
- Easter Pastel Version: Work each piece in a different soft pastel — mint body, yellow ears, peach legs — for a spring Easter display or Easter basket gift.
- Halloween Cockapoo: Black coat with orange muzzle and accent stitches. Add tiny yarn bat wings or a pumpkin accessory for a craft fair seasonal item.
- Galaxy / Cosmic: Deep purple main coat (Red Heart Soft “Boysenberry”) with teal loop stitch accents and silver embroidery highlights on the muzzle. Unexpected and stunning.
- Christmas Version: Red coat (Red Heart Super Saver “Cherry Red”) with white muzzle and a tiny crocheted Santa hat. Staggeringly popular as a Christmas gift — make a dozen.
🎨 Color Tip: The Cotton Candy Pink Cockapoo is your single highest-performing Pinterest colorway. Soft pink amigurumi dogs photograph beautifully against white or sage green backgrounds, get massive engagement in crochet communities, and sell fast at craft fairs. If you only make one fantasy colorway this season, make pink.
Beginner Tips for the Best Results
Getting a beautiful Cockapoo amigurumi is all about nailing a few specific challenges unique to this breed. These tips will save you hours of frustration.
- Master the loop stitch first. The loop stitch is the single most important technique in this entire pattern. Before casting on the body, practice on a 12-stitch swatch for two or three rounds until your loops are consistent in length.
- The most common beginner mistake: over-stuffing the muzzle. A muzzle stuffed too firmly sticks out at an unnatural angle. Add the tiniest pinch of fiberfill — or none at all — and let the flat piece create gentle dimension on its own.
- Tension on the head and body matters most. Keep your tension firm and consistent so the stuffing doesn’t show through. If you can see white stuffing through the stitches, your tension is too loose — tighten up or drop one hook size.
- Pin ears before committing. The Cockapoo ear position is make-or-break for the whole piece. Pin both ears in at least three different positions and photograph each one before deciding. A forward-drooping placement at round 5–6 from the top is almost always the most realistic.
- Fluff the coat after assembly. Use a soft pet slicker brush or the tip of a yarn needle to very gently tease the loop stitches outward. This dramatically improves the fluffy, curly coat appearance and the resulting photos.
- The most rewarding moment: the ears going on. That is the exact moment the piece transforms from a round blob into an unmistakable Cockapoo. Trust the process through the earlier stages — that moment makes everything worth it.
Seasonal & Gifting Ideas
[IMAGE: Cockapoo amigurumi displayed in four seasonal settings — spring flowers, Halloween pumpkins, Christmas wreath backdrop, and birthday gift wrapping]
A finished Cockapoo amigurumi is never just a toy — it is a keepsake, a memorial, a celebration. Here are the best ways to use and gift your finished piece.
- Dog memorial gift: A Cockapoo amigurumi crocheted in the exact coat color of a beloved dog is one of the most meaningful handmade gifts imaginable. Add an embroidered name tag on a crochet collar for a truly personal touch.
- New puppy celebration gift: For a friend bringing home a new Cockapoo puppy, a handmade version of their exact pup — in the right coat color — is an unforgettable, Instagram-worthy gift.
- Birthday gift: Perfect for dog-obsessed children ages 5 and up (use the embroidered eye version for under-3) and for adult Cockapoo parents of any age. Pair with a crochet bone or ball for a complete gift set.
- Craft fair bestseller: Realistically priced at $25–$40 USD depending on size and complexity. A display of three or four in different coat colors sells faster than a single piece. A cotton candy pink version priced at $30 is reliably the first to sell.
- Set or collection: Make a Cockapoo family — a larger parent with two smaller pups in coordinating colors. Or make a set of three in “Cockapoo coat spectrum” colors (apricot, chocolate, cream) for a collector’s display piece.
- Keychain or bag charm version: A miniature Cockapoo works brilliantly as a bag charm. See sizing options below for the mini version instructions.
Sizing Options
- Mini keychain version: Fingering weight yarn (Category 1) with US B/1 (2.25mm) hook. Finished size approximately 2.5 inches. Attach a key ring through a short chain stitch loop at the top of the head. Price at craft fairs: $8–$12.
- Standard size as written: Approximately 6 inches seated. The sweet spot for display, gifting, and photography.
- Large display version: Bulky weight yarn (Category 5) with US K/10.5 (6.5mm) hook. Finished size approximately 10–12 inches seated. Price at craft fairs: $55–$75.
Safety Notice
Safety eyes pose a choking hazard for children under 3 years old. Always use the fully embroidered eye option for any piece intended for babies, toddlers, or young children. Weave in all yarn ends securely with direction changes — not just a simple weave — to prevent them pulling free with use. Check all sewn joins before giving a finished piece to a child, squeezing and pulling gently to ensure everything is firmly attached. When in doubt, add an extra row of securing stitches around every join.
Free Printable Pattern Download
This pattern is completely free for personal use and for making finished items to sell — no credit required, though a link back to this page is always warmly appreciated. The written pattern itself may not be reproduced, copied, or sold in any form — please share the link to this page instead of copying the text.
Printed at standard font size on US Letter paper, this pattern fills approximately 8–10 pages including the tables and tip boxes. Print single-sided for easy reference at your craft table, or print double-sided and pop it in a project folder. A print-to-PDF option works perfectly for tablet or device use at your crochet spot.
Frequently Asked Questions
How long does a Cockapoo amigurumi take to crochet?
Most intermediate crocheters complete a Cockapoo in 8–12 hours of active crochet time spread across several sessions. The loop stitch sections add some time compared to plain single crochet — expect the body and ears to take longer than the head. If you are newer to the loop stitch, add an extra 1–2 hours for the learning curve on your swatch. The assembly takes approximately 45–60 minutes when done carefully with pinning.
Can I use DK weight yarn instead of worsted?
Yes — DK weight (Category 3) works well with a US E/4 (3.5mm) hook. Your finished Cockapoo will be approximately 4–4.5 inches tall seated instead of 6 inches. DK weight also produces a finer, softer loop stitch texture. The stitch counts remain the same. DK weight is a great choice for the miniature or keychain version.
My loop stitches are uneven — how do I fix it?
Uneven loop stitches almost always come from inconsistent finger tension while forming the loops. Try wrapping the yarn around two fingers instead of one — this forces a more consistent loop size. Also, work at a slightly slower pace and pull each loop to the same height (approximately 1 inch) before completing the stitch. Frogging the affected rows and reworking slowly is absolutely worth it — even loops are the difference between “handmade” and “professional” on this piece.
My ears are not draping correctly — tips for getting it right?
The most reliable fix is the pipe cleaner method. Before sewing the ears on, thread a pipe cleaner cut to size along the center spine of each ear, fold the wire ends back so they do not poke through, then position and pin the ear to the head. The wire lets you bend and adjust the drape to exactly the right angle. Once you are happy with the position, sew the ear securely and the wire holds the shape permanently.
Can I substitute the magic ring?
Yes. If the magic ring is not comfortable for you, chain 2 and work the required number of single crochets into the second chain from the hook. Pull the starting tail to close the small center gap. The magic ring produces a slightly neater, tighter center — but the chain-2 method works perfectly and many crocheters prefer it.
Can I sell finished Cockapoos made from this pattern?
Yes — you are welcome to sell finished items made from this free pattern in any quantity, at craft fairs, online marketplaces like Etsy, or through your own channels. The pattern text itself may not be copied, reproduced, or sold. If you are asked where your pattern is from, please link back to this page.
What is the best way to display or gift a finished Cockapoo?
A few ideas that work beautifully: sit the finished Cockapoo in a small wicker basket lined with tissue paper for an elegant gift presentation; pose it on a small wooden shelf with a tiny framed photo of the real dog it represents; display it on a bookshelf with other amigurumi in a breed collection arrangement; or attach a magnet to the base for a refrigerator display. For a memorial gift, pair it with a small printed poem card tucked into the gift box.
More Free Crochet Patterns You’ll Love
If the Cockapoo pattern has got you hooked, here are some wonderful next projects to try:
- Cockapoo Crochet Pattern Ideas (5 Inspiring Designs)
- Free Labradoodle Crochet Pattern
- Free Golden Retriever Amigurumi Pattern
- Free Poodle Crochet Pattern
- Free Cavapoo Crochet Pattern
- Free Dog Collar and Bow Tie Crochet Accessory Pattern
- Free Amigurumi Dog Bone and Ball Crochet Pattern
- Free Teddy Bear Amigurumi Pattern for Beginners
- Free Easter Bunny Amigurumi Pattern
Final Thoughts
There is something genuinely magical about transforming a skein of yarn into a loopy-eared, button-eyed little Cockapoo. The combination of loop stitch texture, those signature floppy ears, and the compact rounded body creates a finished piece that is unmistakably, joyfully this breed — recognizable from across a room. Every person who has ever loved a Cockapoo will feel it the moment they see your finished doll.
The loop stitch coat requires the most patience of anything in this pattern — especially across the larger body rounds. But take it one section at a time, keep your loops consistent, and trust that the texture builds into something spectacular. The ears going on is the moment everything comes together — and making three in different colors, once you know the pattern, is genuinely twice as satisfying as making just one.
When your Cockapoo is finished, share it on Pinterest and tag it with “Cockapoo crochet,” “dog amigurumi,” and “free crochet pattern” — this breed is a consistent top performer in the crochet community and your work deserves to be seen. Share it on Facebook dog groups, crochet communities, and Instagram Reels for maximum reach. Happy crocheting! 🧶