Crocheters who enjoy cute and simple projects will like the free amigurumi chubby pear cat crochet pattern. This design blends a round cat shape with a soft pear body, which gives it a playful look. It suits beginners and experienced makers who want a small, handmade toy.
This article explains how to crochet a free chubby pear cat amigurumi pattern, including materials, basic steps, and helpful tips to shape the cat. It also covers yarn choices, beginner advice, and ideas for using the finished piece. By the end, they will understand how to plan, stitch, and finish a soft pear-shaped cat with clean details.
1) Introduction to the Free Amigurumi Chubby Pear Cat Crochet Pattern

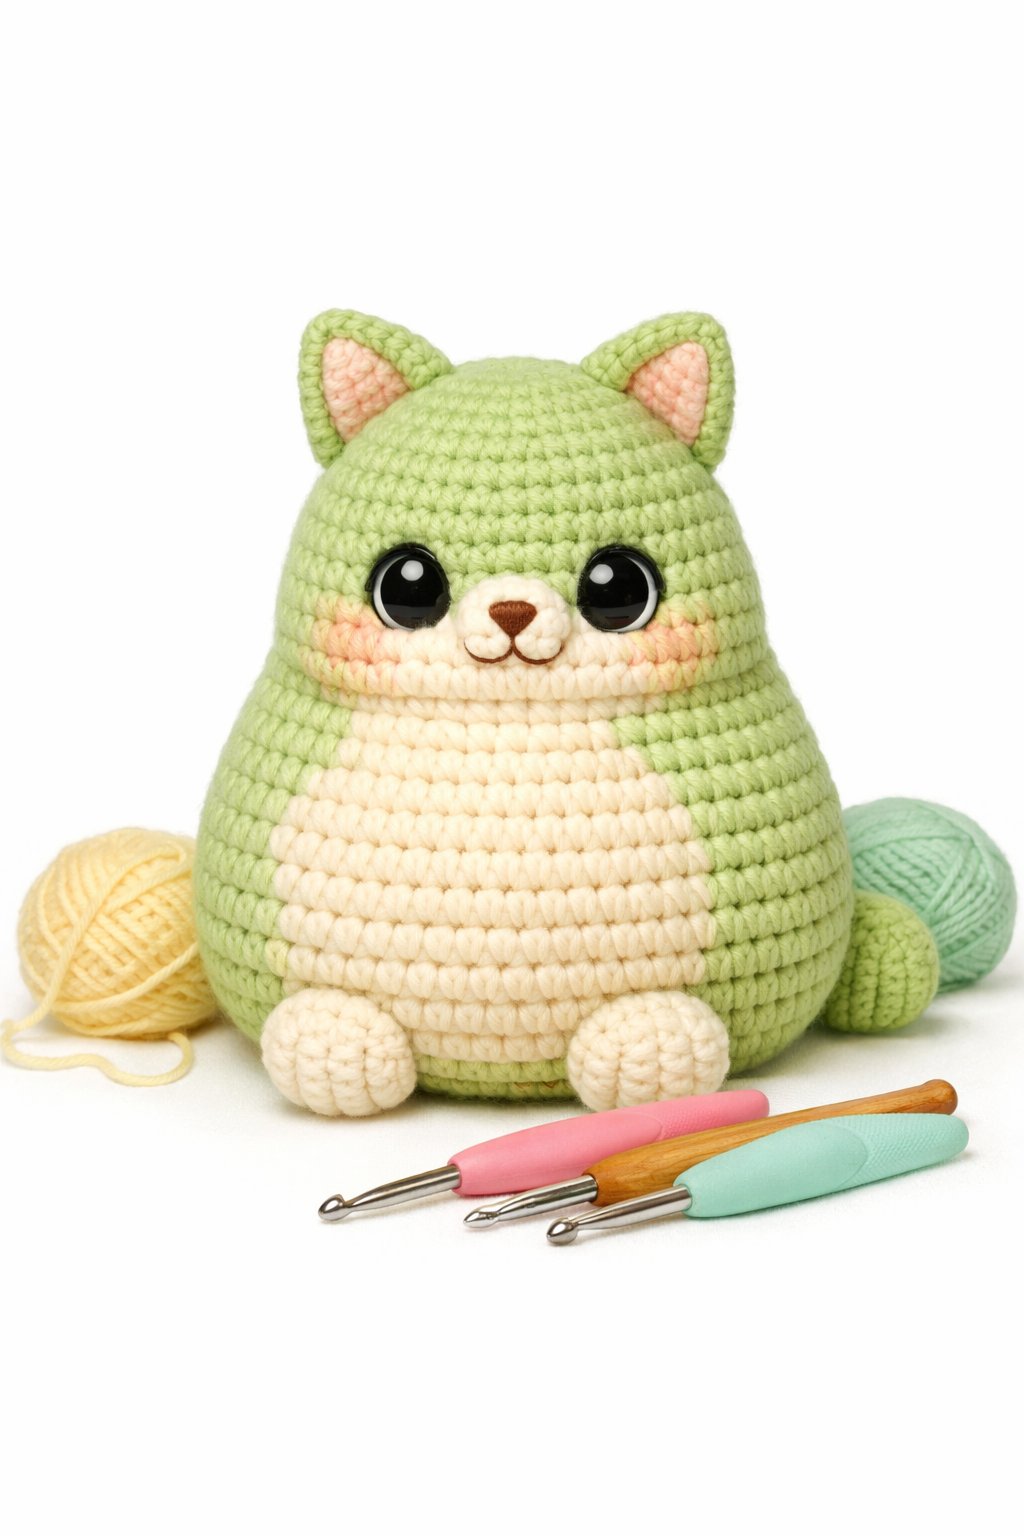
The Free Amigurumi Chubby Pear Cat Crochet Pattern offers a playful twist on a classic cat design. It features a round, pear-shaped body and wide, expressive eyes that give the toy a light and friendly look.
This pattern suits beginners and experienced crocheters alike. It uses basic stitches and simple shaping to create a soft, squishy form.
Crafters can use it to make a small gift, a child’s toy, or a decorative piece. The design focuses on clear steps and approachable construction.
2) Materials Needed for the Chubby Pear Cat Project
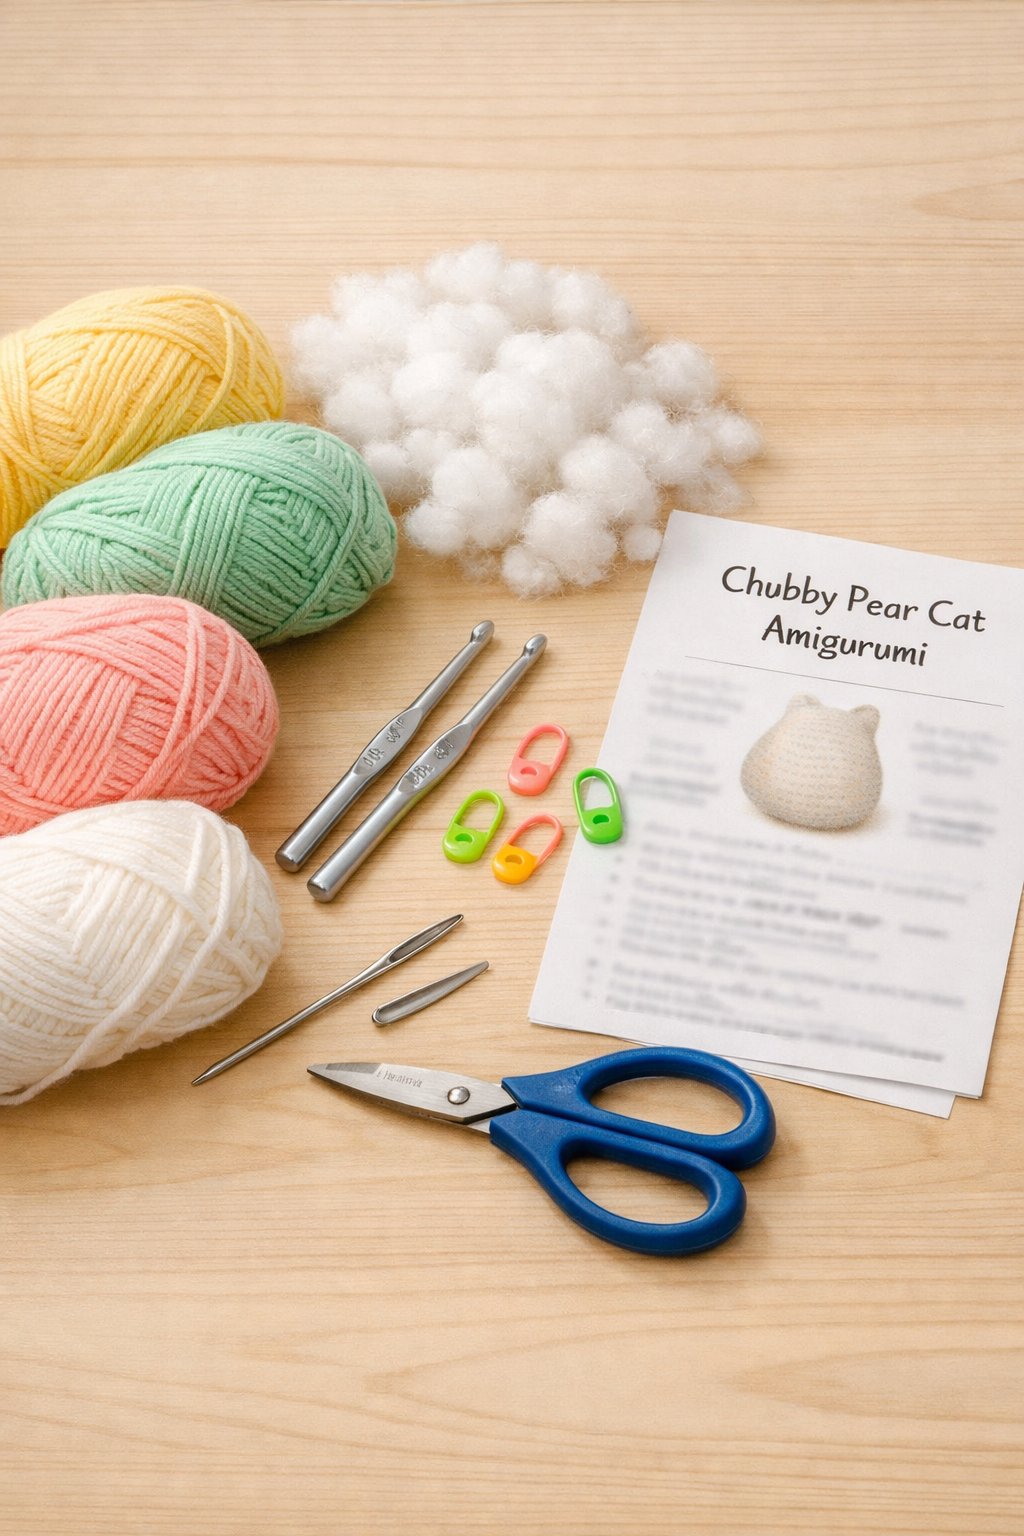
The maker needs medium-weight cotton or acrylic yarn in two main colors. One color forms the pear-shaped body, often green or yellow, and the other creates small details like the ears or tail.
They should use a crochet hook that matches the yarn weight, usually 3.0–4.0 mm. A smaller hook helps keep stitches tight so stuffing does not show.
Polyester fiberfill works well for stuffing. Safety eyes, black embroidery thread, a yarn needle, scissors, and stitch markers will also help complete the project neatly.
3) Step-by-Step Instructions to Crochet the Chubby Pear Cat
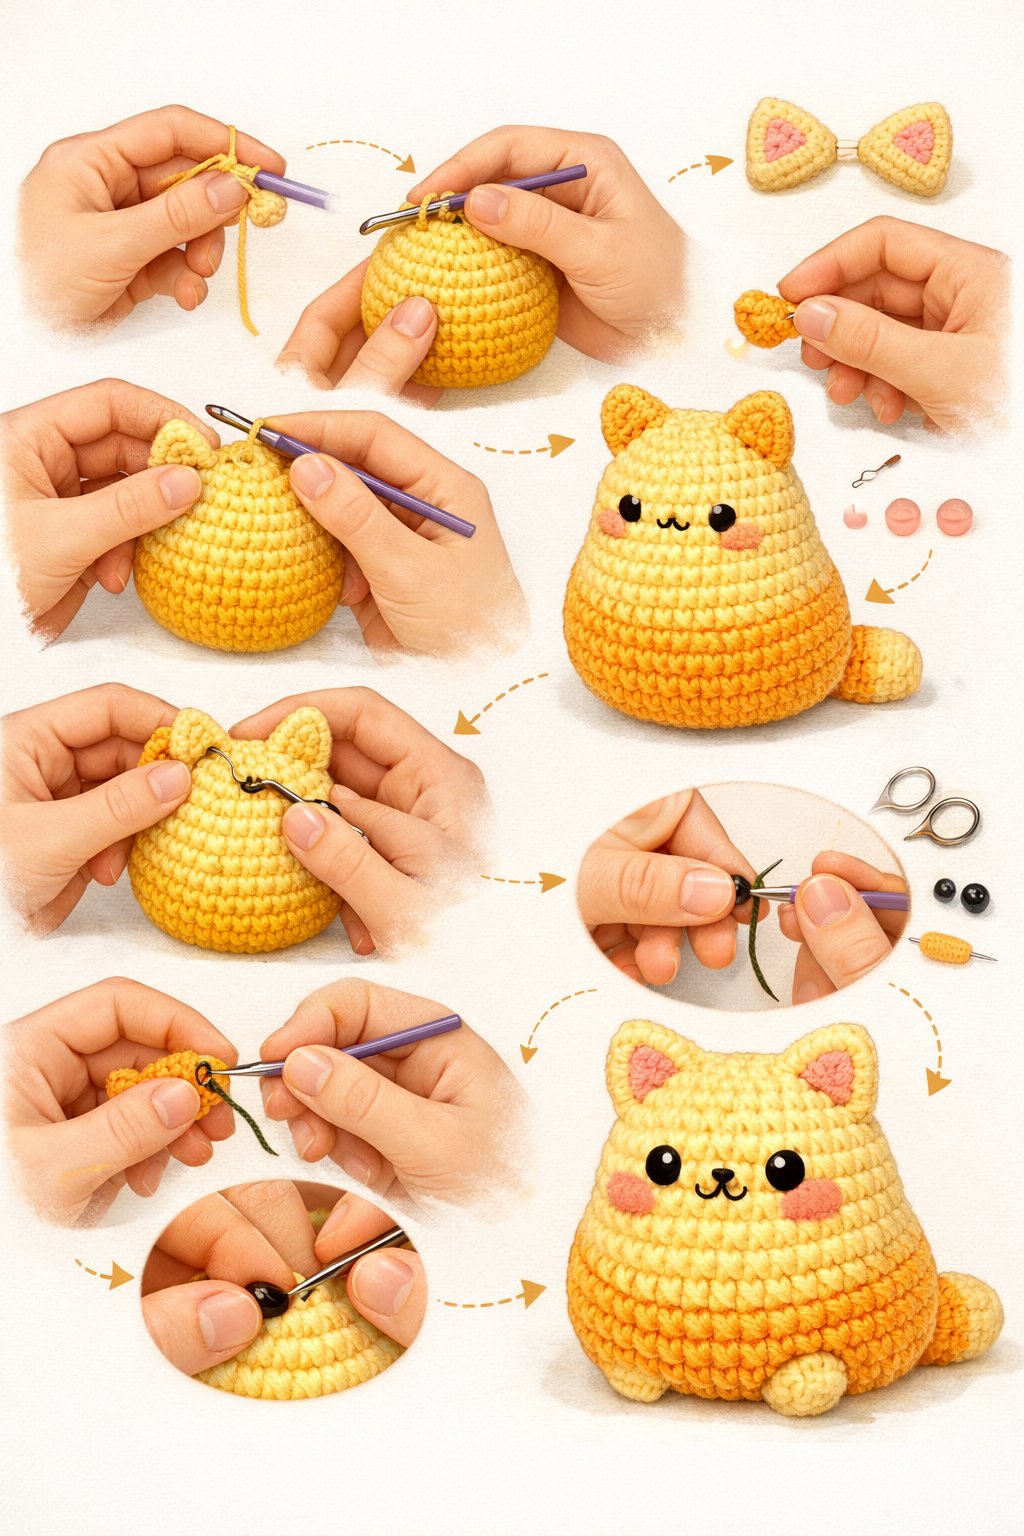
The crocheter starts with the body, which forms the pear shape. They work in continuous rounds, increasing at the base to create a wide bottom. As the rounds go up, they decrease slowly to shape the top.
They stuff the body firmly to keep it round and stable. A flat base helps the cat sit upright.
Next, they crochet the head if it is separate, or continue shaping it from the body. They attach safety eyes and embroider the nose and mouth.
Finally, they add small ears, tiny paws, and a short tail, then sew all pieces in place.
4) Tips for Perfecting Your Amigurumi Cat Shape
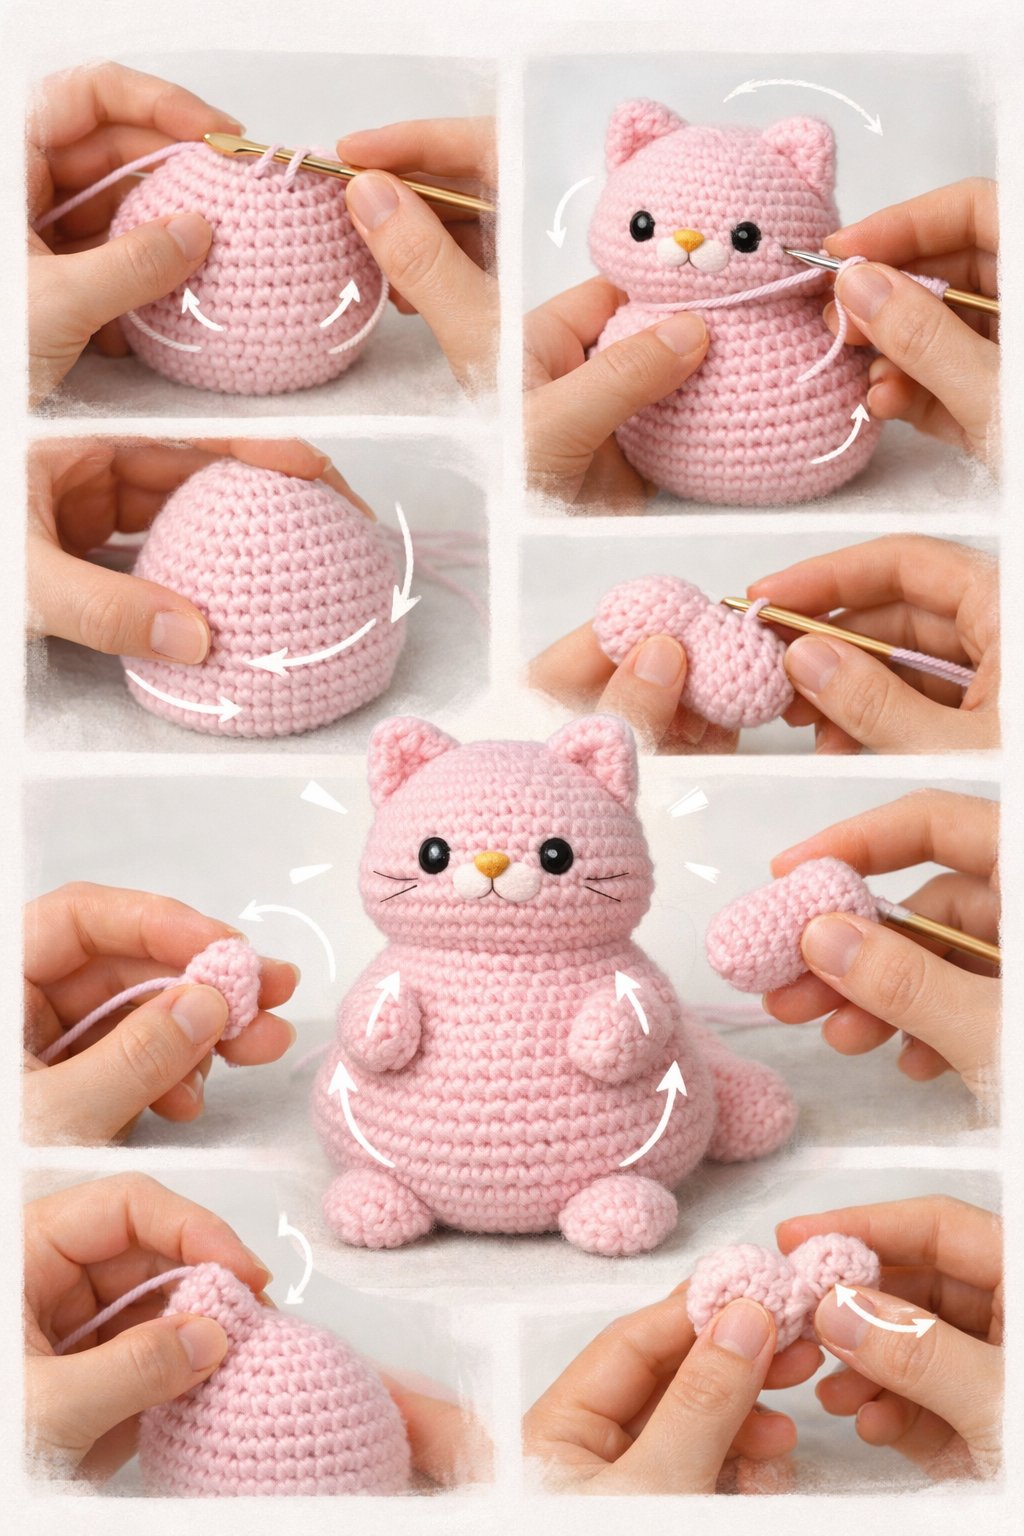
Use tight, even stitches to help the pear shape hold its form. Loose stitches can make the body look uneven or lumpy. A smaller hook often helps create firm fabric.
Stuff the body slowly and in small amounts. They should shape the belly first, then add more stuffing to the top. This method keeps the bottom round and the top slightly narrower.
Place safety eyes before final stuffing. They should sit evenly on both sides of the face. Small changes in placement can shift the cat’s whole expression.
Shape the body gently with their hands as they stuff. This keeps the pear outline clear and balanced.
5) Creative Uses for Your Finished Chubby Pear Cat
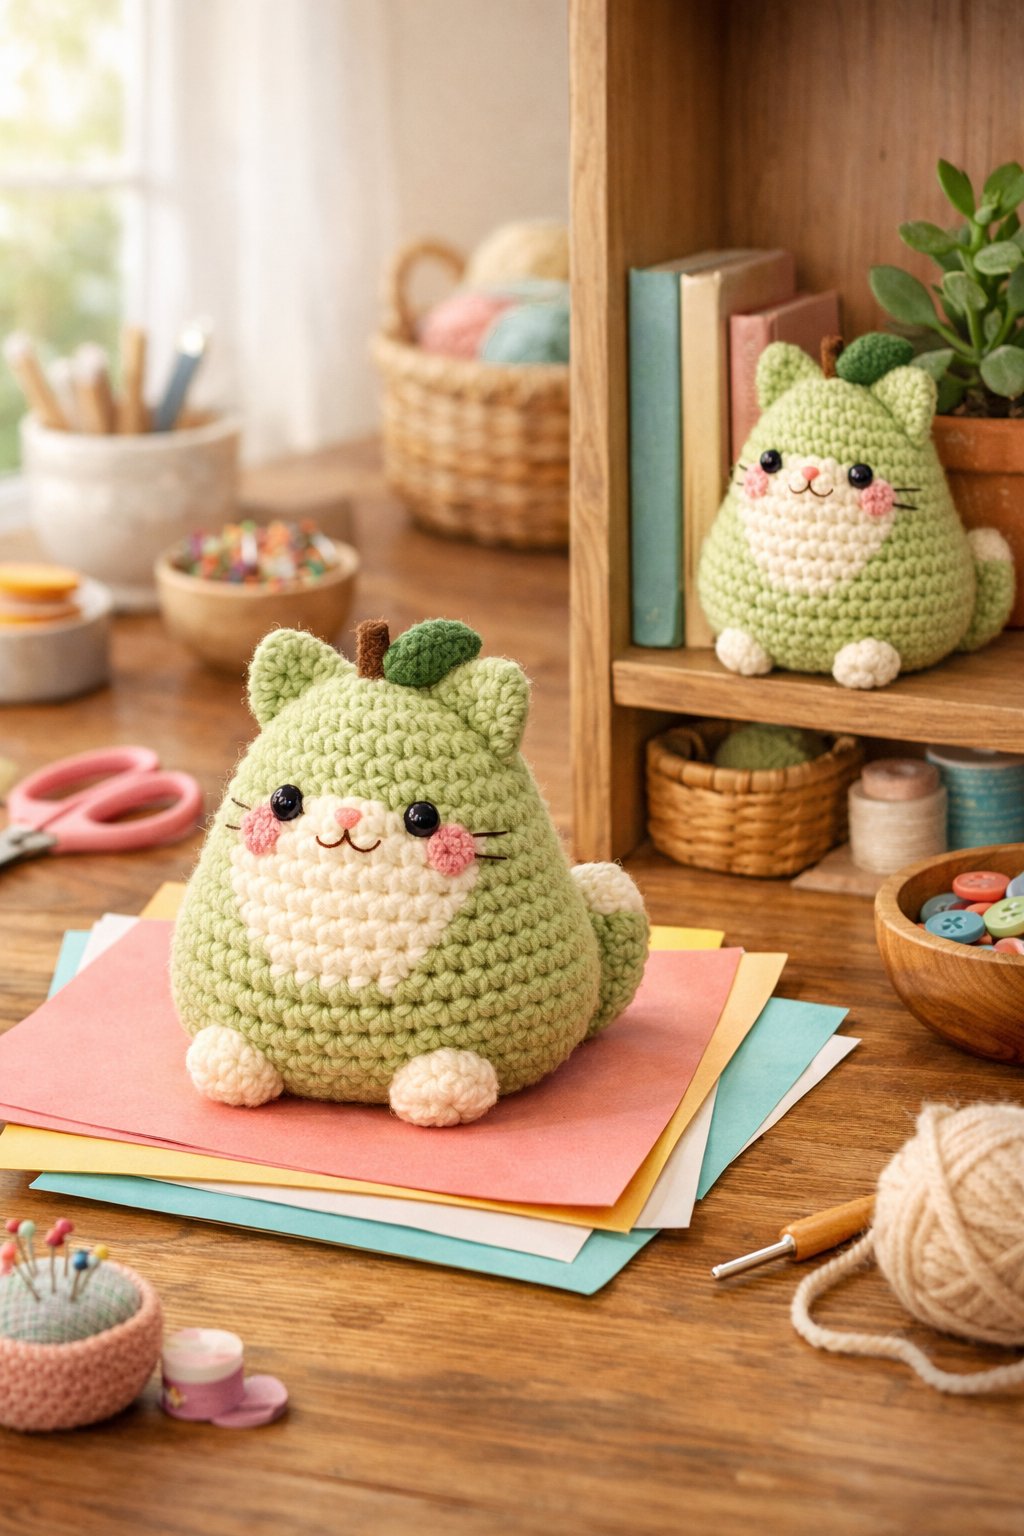
They can place the chubby pear cat on a desk or shelf as simple home decor. Its small size, about 5.5 inches tall with standard yarn, fits well in tight spaces.
Parents can give it to a child as a soft toy for gentle play. The plush shape and rounded body make it easy to hold.
Crafters can use it as a handmade gift for cat lovers. It also works well as a market item at craft fairs.
They can attach a keychain loop to turn it into a bag charm. This adds a personal touch to everyday items.
Materials and Yarn Recommendations
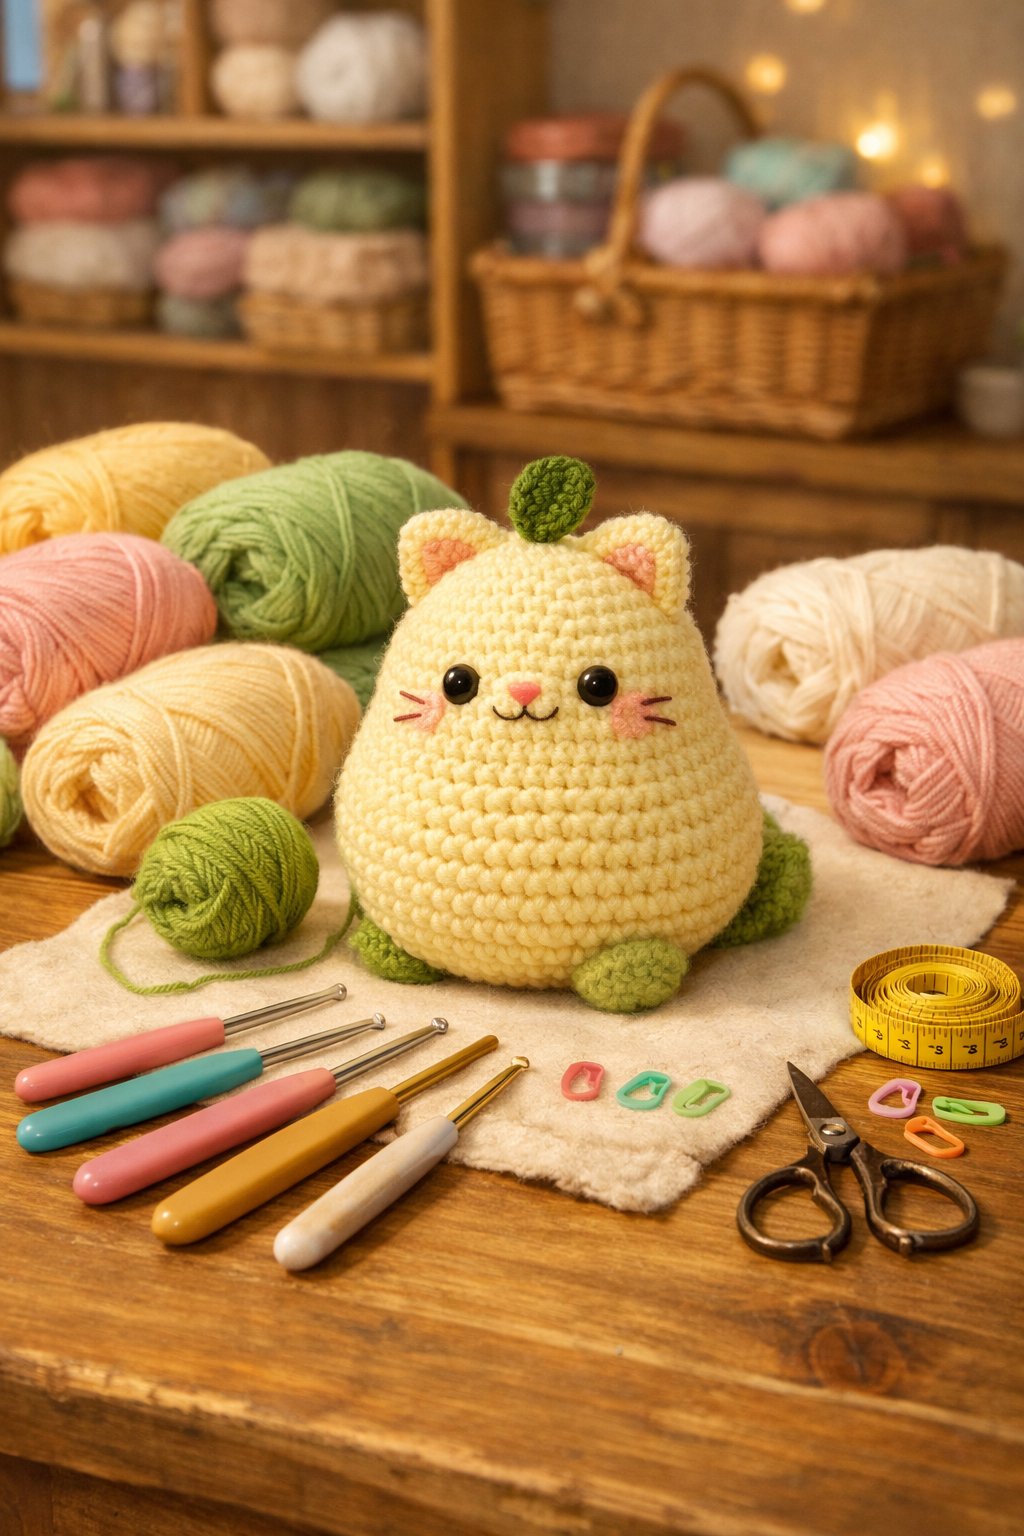
The right materials shape the size, texture, and durability of a chubby pear cat. Yarn weight, hook size, and eye type all affect how the finished toy looks and holds up over time.
Choosing the Right Yarn Weight
Yarn weight controls the final size and firmness of the pear cat. Most patterns use sport weight cotton yarn for a small toy that measures about 5 to 6 inches tall. This weight creates tight stitches and clear shaping.
Cotton yarn works well for amigurumi because it has little stretch. It helps the round body keep its pear shape. Acrylic yarn also works, but it stretches more and can make stitches look less defined.
For a larger plush, crafters can use worsted weight or even super bulky chenille yarn. A thicker yarn can increase the height to 6–8 inches or more, depending on tension.
Suggested amounts:
- Main body color: 50–70 grams
- Accent color (ears, stripes, or leaf): 20–30 grams
Using two colors adds contrast and highlights the pear design.
Selecting Crochet Hook Sizes
Hook size must match the yarn weight to create tight stitches. Amigurumi requires dense fabric so stuffing does not show through.
For sport weight yarn, a 2.5 mm to 3.5 mm hook works well. Many patterns suggest a 3.5 mm hook for a toy around 6 inches tall.
For worsted weight yarn, a 3.5 mm to 4.5 mm hook often gives the right tension. Super bulky yarn may need a 5 mm hook.
If stitches look loose or stuffing shows, the maker should switch to a smaller hook. The fabric should feel firm but not stiff.
A simple guide:
| Yarn Weight | Common Hook Size |
|---|---|
| Sport | 2.5–3.5 mm |
| Worsted | 3.5–4.5 mm |
| Super Bulky | 5 mm |
Testing a small swatch helps confirm the tension before starting the full project.
Benefits of Using Safety Eyes
Safety eyes give the chubby pear cat a clean and polished look. They attach through the fabric and lock in place with a plastic backing.
Most small amigurumi toys use 6 mm to 10 mm safety eyes. The size depends on the finished height of the toy. Larger eyes create a cuter, more playful look.
Safety eyes stay secure when installed correctly. The maker should attach them before stuffing the head. Once locked, they cannot be removed easily.
For toys meant for babies or toddlers, embroidered eyes offer a safer option. Stitching the eyes with black embroidery thread removes any choking risk.
Both options work well. The choice depends on the toy’s purpose and the age of the person who will use it.
Crocheting Tips for Beginners

Good stitch control, tight tension, and proper stuffing shape the pear cat’s round body and smooth surface. When beginners focus on these basics, they create a clean and balanced amigurumi piece.
Understanding Common Stitches
Most amigurumi patterns use a small group of basic stitches. A beginner should feel confident with the magic ring, single crochet (sc), increase (inc), and decrease (dec).
The magic ring starts the project in a tight circle. It closes the center hole, which works well for the pear cat’s rounded base. If the center stays loose, the stuffing may show through.
Single crochet forms the main fabric. It creates a dense texture that holds stuffing in place. Patterns often use increases to make the body wider and decreases to shape the top.
Invisible decreases help keep the surface smooth. Instead of crocheting through both loops, the crocheter works through the front loops only. This method reduces gaps and keeps the stitches neat.
Preventing Gaps in Amigurumi
Small gaps can ruin the smooth look of a chubby pear cat. Tight and even tension prevents most of these issues.
A smaller hook often helps. Many pear amigurumi patterns suggest a hook slightly smaller than the yarn label recommends. This creates a firm fabric with fewer holes.
He or she should also avoid over-stretching stitches while working. Pulling loops too tall can leave visible spaces between stitches.
Stuffing too early can stretch the fabric. It helps to add stuffing gradually as the piece grows. If gaps still appear, the crocheter can adjust tension or switch to a smaller hook for the next project.
Stuffing Techniques for Chubby Shapes
The pear cat has a wide bottom and a narrower top. Proper stuffing gives it a balanced, rounded look.
He or she should use small pieces of fiberfill instead of one large clump. Small amounts spread more evenly and reduce lumps.
It helps to shape the bottom first. The crocheter can press stuffing firmly into the base to create a stable, flat surface. Then they can add softer stuffing near the top to keep the pear shape smooth.
A simple checklist keeps the shape consistent:
- Firm base for stability
- Even sides with no hollow spots
- Smooth top without bulges
He or she can adjust the shape by gently squeezing and redistributing the filling before closing the final stitches.